Author: Colleen Grace

  • 21 Fresh Rooftop Vegetables Garden Ideas

    21 Fresh Rooftop Vegetables Garden Ideas

    I stood on my rooftop last summer, wind whipping through, staring at empty pots. Years of trial and error got me here—overturned planters, drowned roots, scrawny yields. But now, fresh veggies grow steady.

    Rooftops aren't lawns. They're tight, exposed spots craving smart setups. I've learned what holds up.

    These ideas come from my own builds. No fluff. Just what works.

    21 Fresh Rooftop Vegetables Garden Ideas

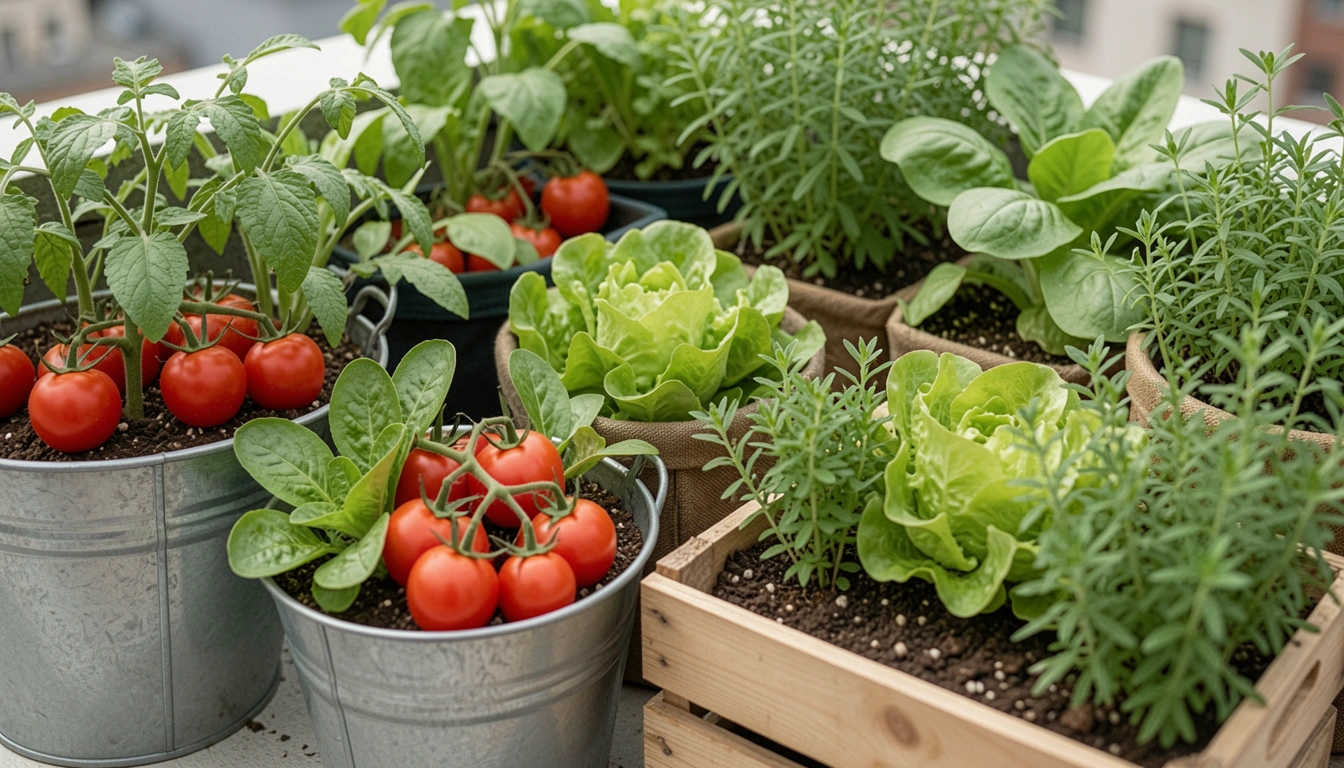
    Here are 21 fresh rooftop vegetables garden ideas I've pieced together from my rooftops. Each one fits limited space and wind. You'll see exactly what to grab and plant—these 21 ideas will get you growing.

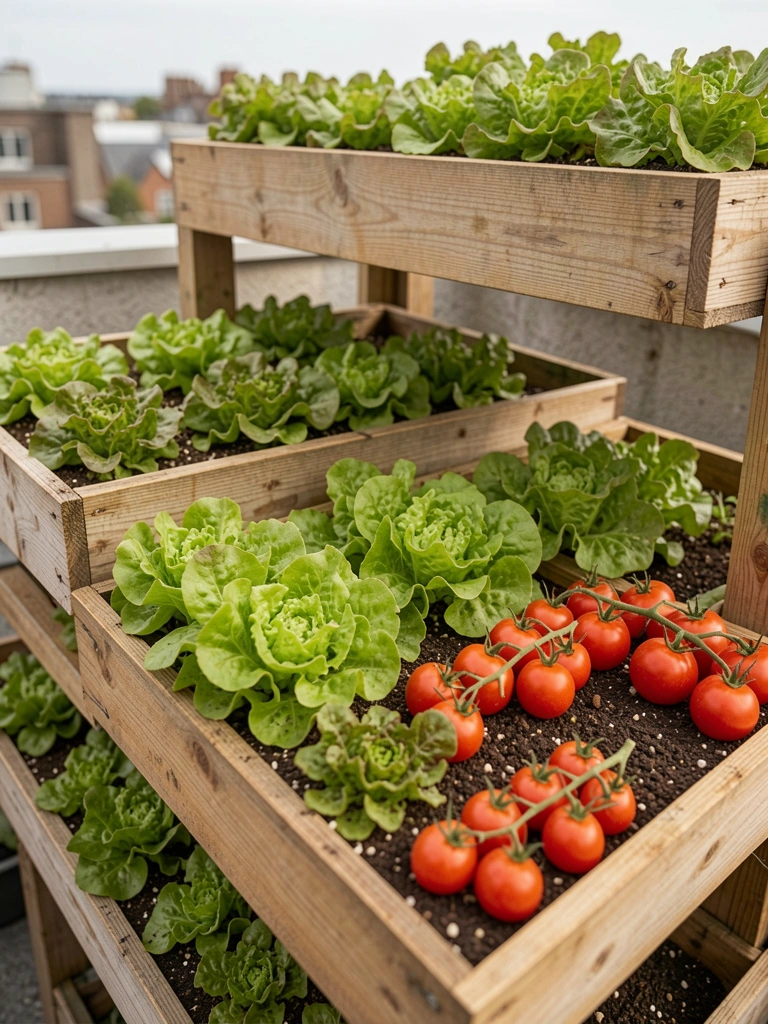
    1. Stacked Wooden Crates for Endless Lettuce Layers

    I started stacking old crates one spring, tired of flat layouts that wasted height. Lettuce filled every shelf—romaine on top for quick picks, butterhead below. The wind barely nudged them once secured. Visually, it turned a bare corner cozy, like a green staircase.

    Harvest felt easy; outer leaves regrew fast. I paid attention to drainage holes—drilled extras after one soggy mess.

    Weight stayed light with potting mix. Succession plant every two weeks for steady salads.

    What You’ll Need for This Look

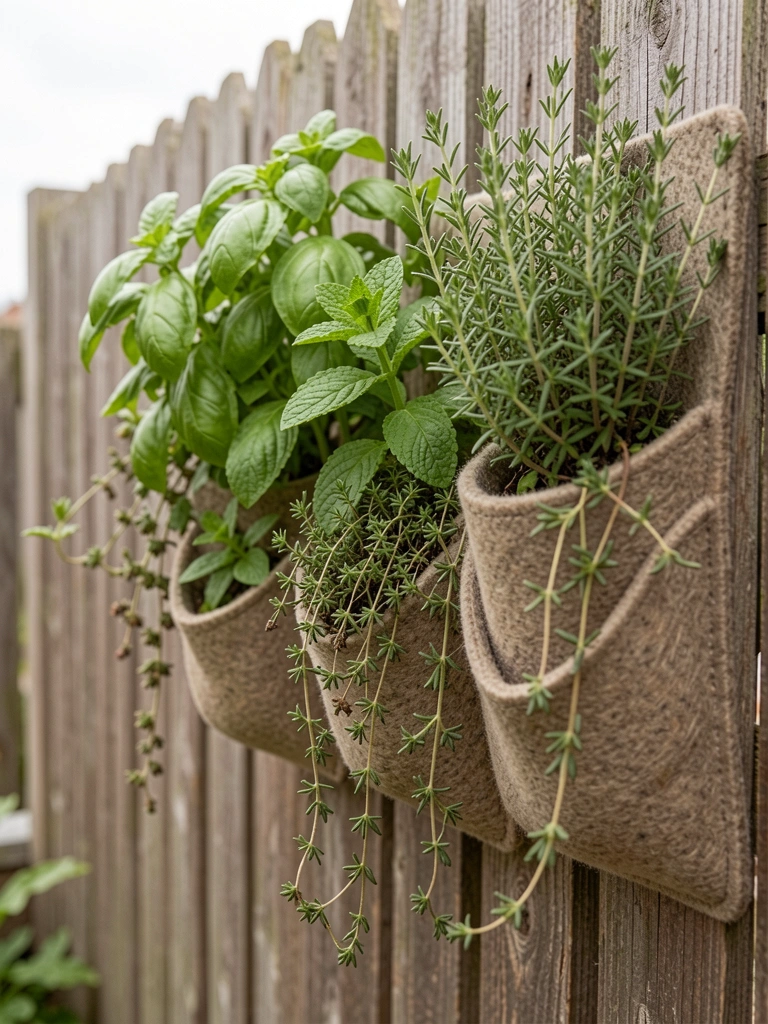
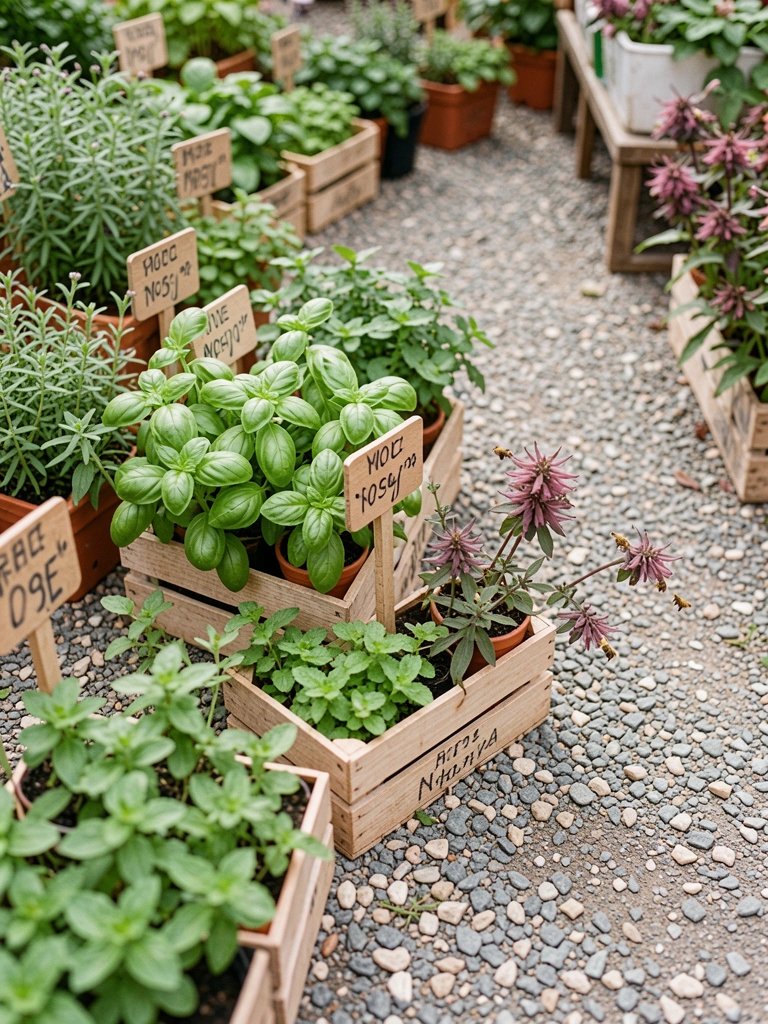
    2. Vertical Pallet Herb Wall Against the Railing

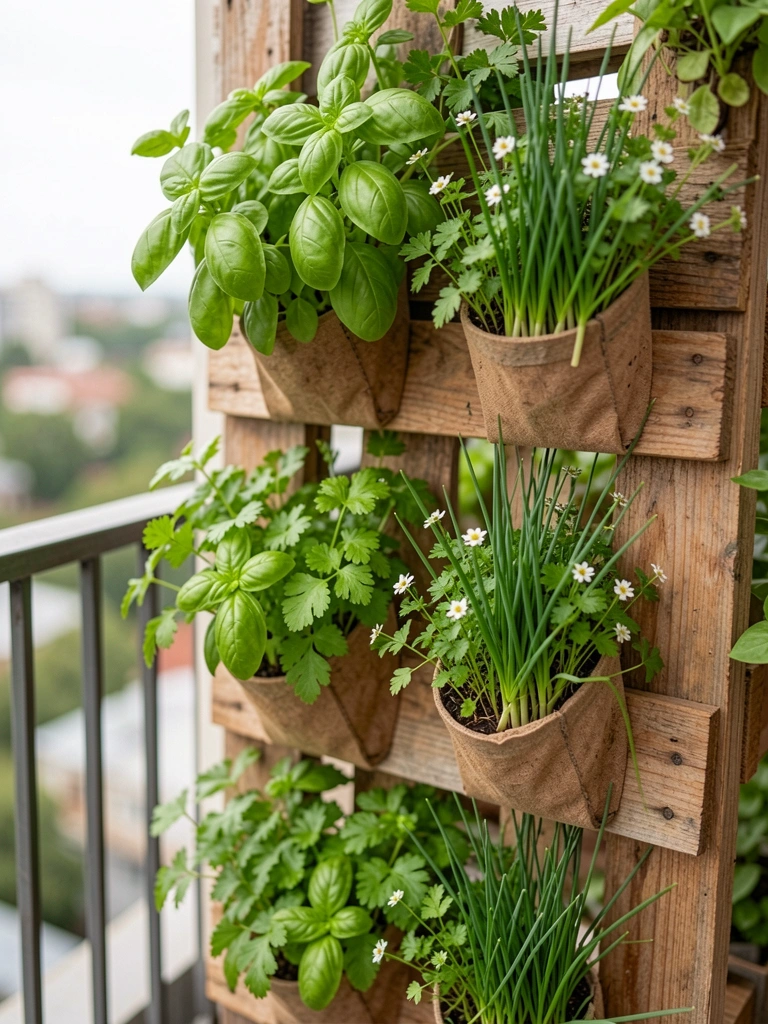
    My railing begged for use, so I leaned a pallet there, lining pockets with soil. Basil climbed fast, parsley stayed bushy—perfect for rooftop snips. It softened the metal edge, made the space feel enclosed.

    I noticed chives self-seed, filling gaps. Wind tugged less with zip ties.

    One mistake: too much sun fried the parsley once. Shade cloth fixed it.

    What You’ll Need for This Look

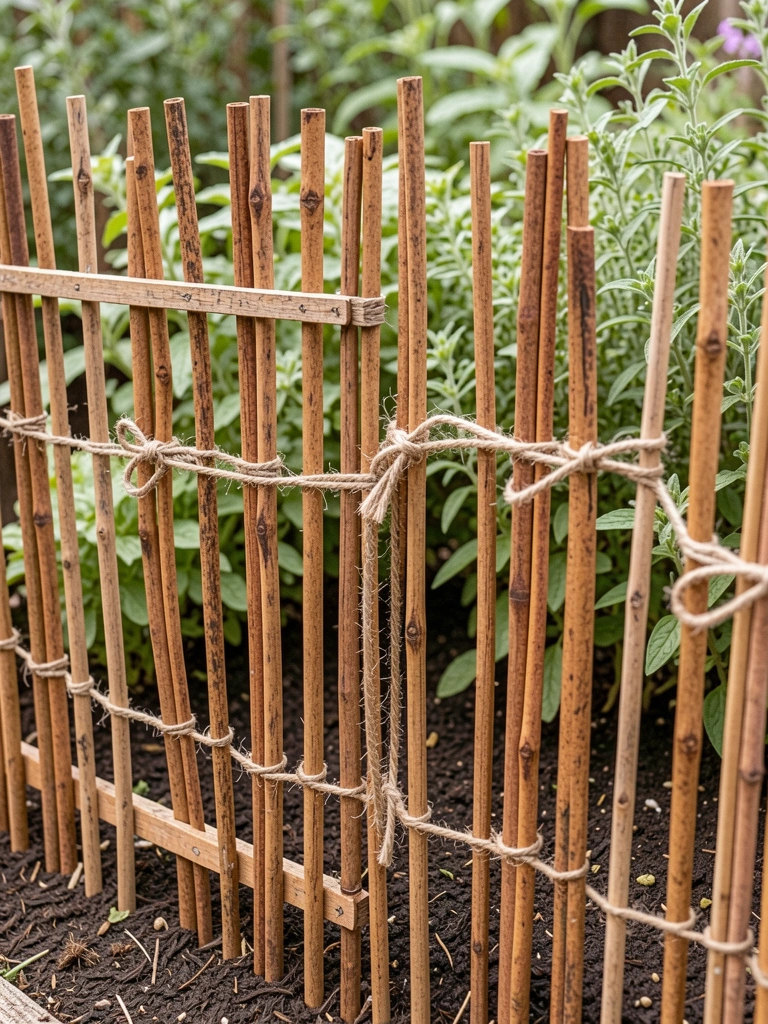
    3. Wind-Tied Tomato Ladders with Basil Feet

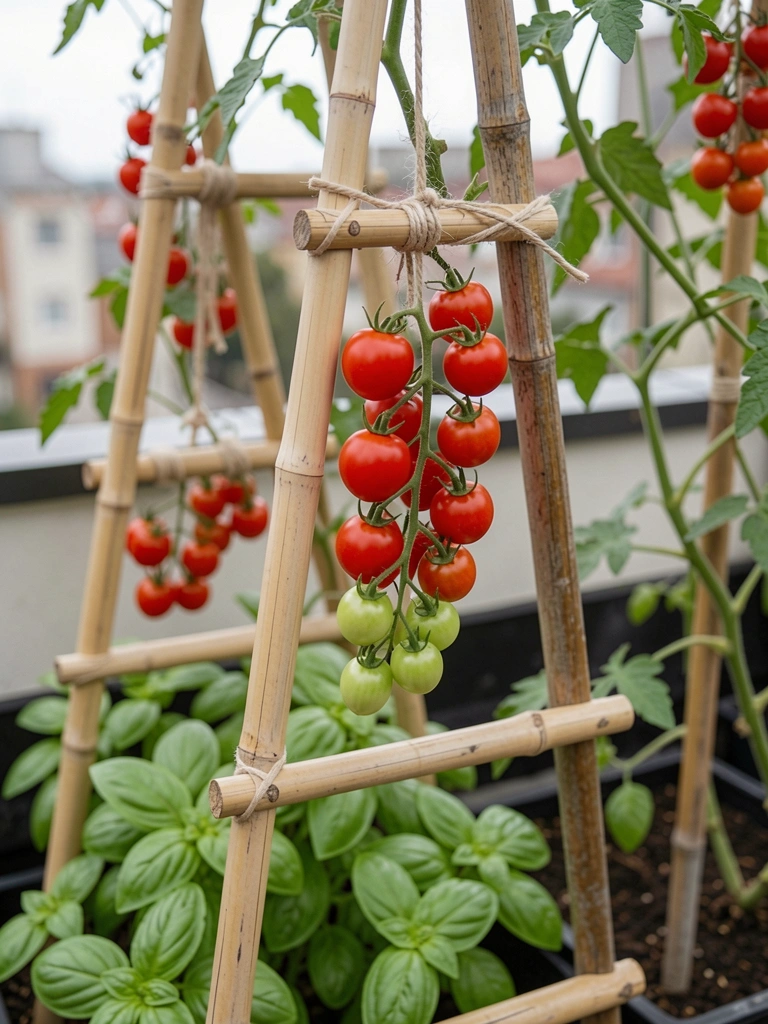
    Tomatoes topple easy up high, so I built ladders from bamboo, tying vines loose. Basil at the bottom repelled bugs—yields doubled. The setup drew eyes upward, reds popping against blue sky.

    Emotionally, plucking warm cherries felt like victory after stake fails.

    Secure to railing. Prune suckers weekly.

    What You’ll Need for This Look

    4. Potato Bags Rolled for Dirt Access

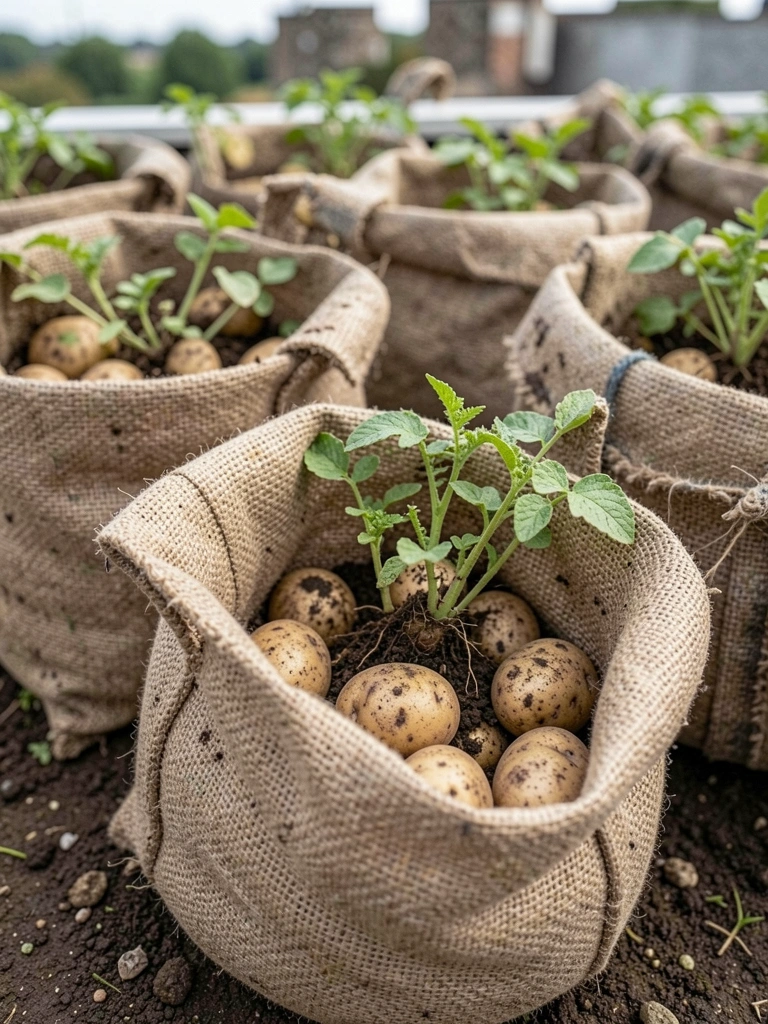
    Potatoes need depth without weight, so grow bags let me roll flaps for hilling. Yukon golds bulged out—harvested 5 pounds per bag. It kept the rooftop tidy, no digging mess.

    I learned to plant seed potatoes shallow first. One year, overwatered rotted them.

    Light fabric dries fast in wind.

    What You’ll Need for This Look

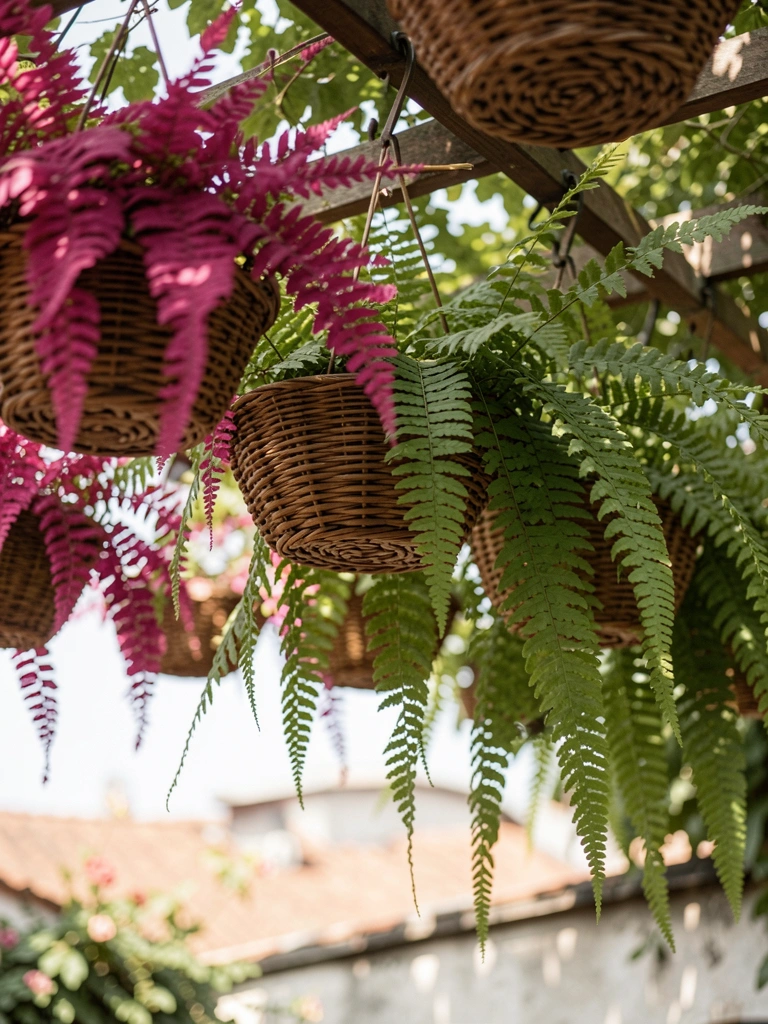
    5. Hanging Baskets Swinging with Peppers

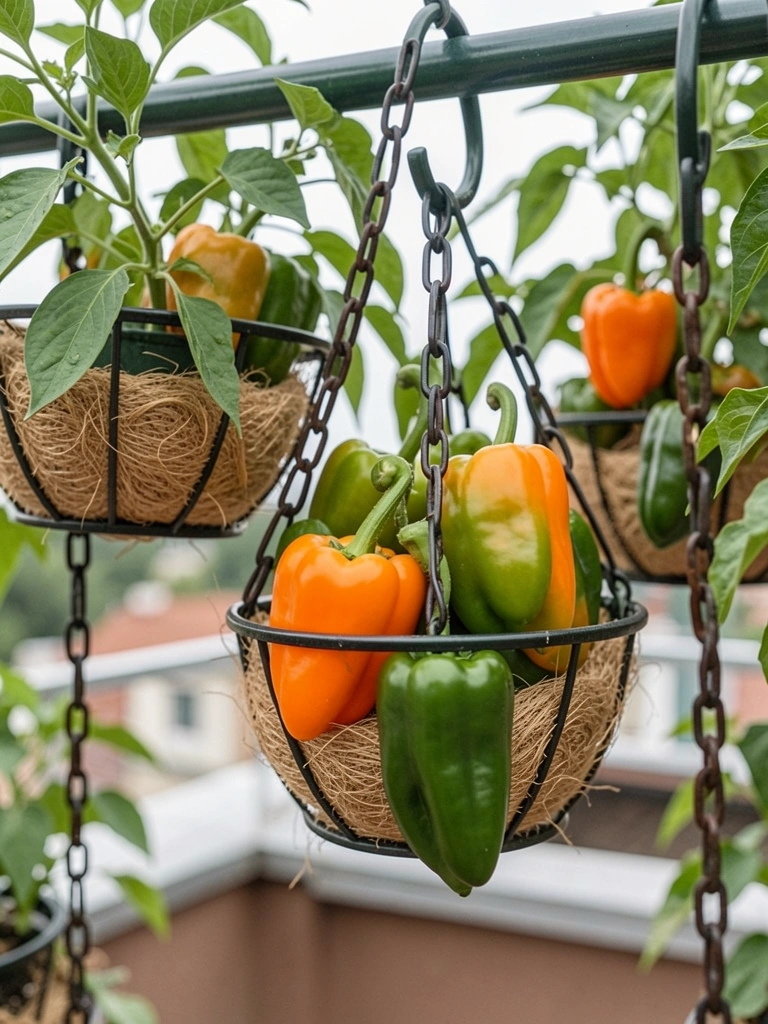
    Hooks off the railing held baskets full of peppers—jalapeños and bells swayed gentle. Space opened below, colors dangled like ornaments.

    They caught full sun, ripened sweet. Mistake: heavy soil tipped one; switched to coir.

    Water from below to save trips.

    What You’ll Need for This Look

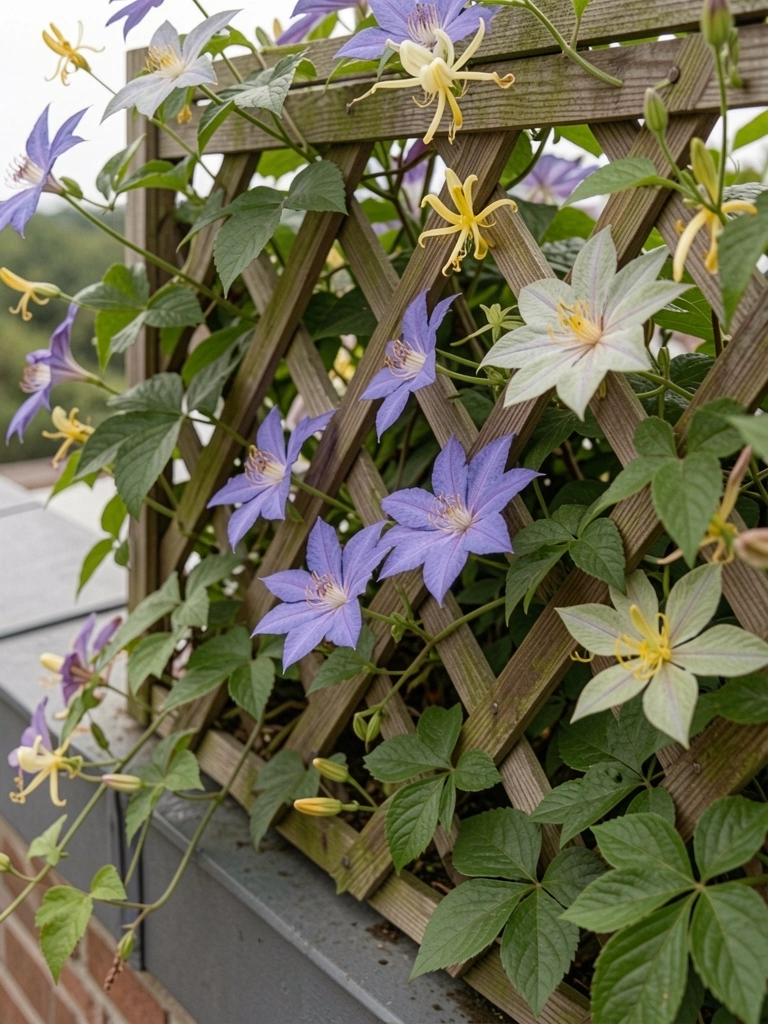
    6. Cucumber Trellis Net Against Plexi Windbreak

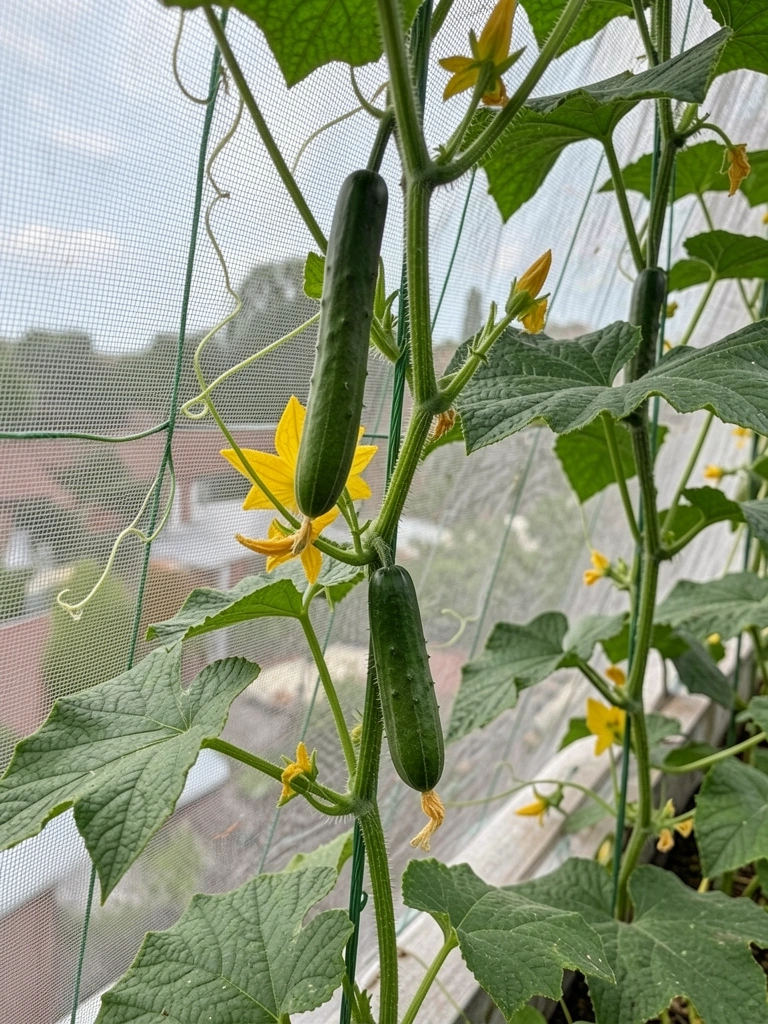
    Wind shredded my cukes till I added plexi sheets as breaks, netting vines up. Lemons hung heavy—picked daily. It framed the view, greens softening edges.

    Climbers saved floor space. Tie loose.

    What You’ll Need for This Look

    7. Carrot Jugs Buried Halfway for Stability

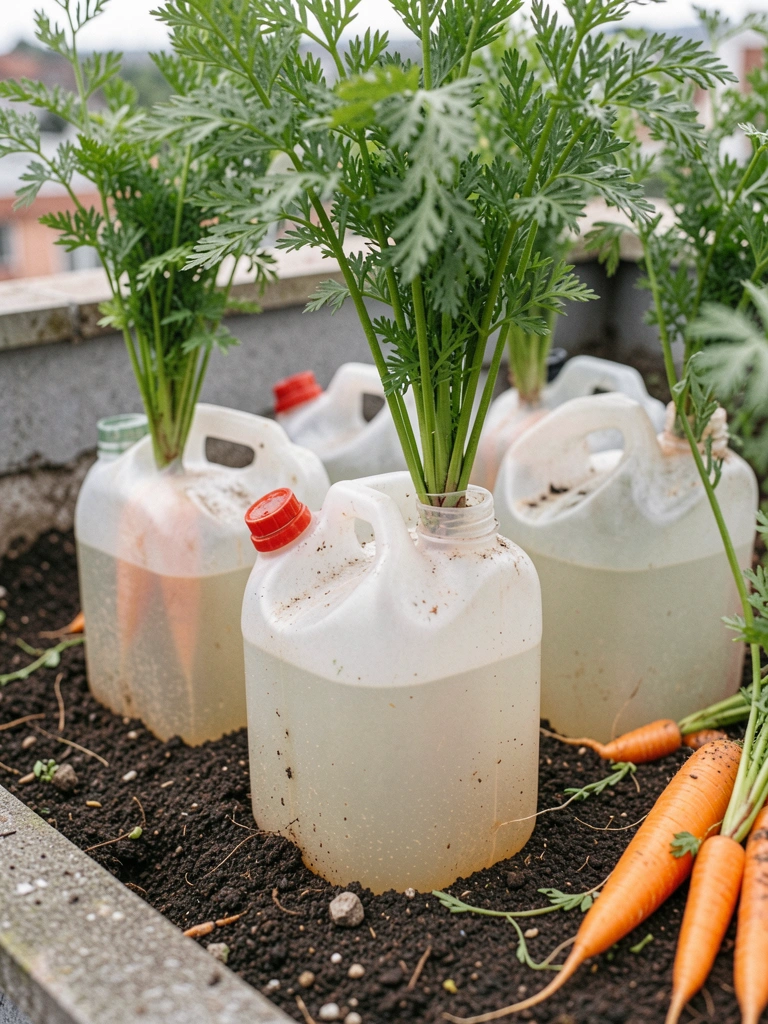
    Cut jugs let carrots root deep without toppling. Nantes variety thinned perfect—sweet pulls. Buried bases weighted them down.

    Visually, tops waved like grass. One batch forked from rocky soil; sift mix next time.

    What You’ll Need for This Look

    8. Bean Teepee Poles in a Tight Circle

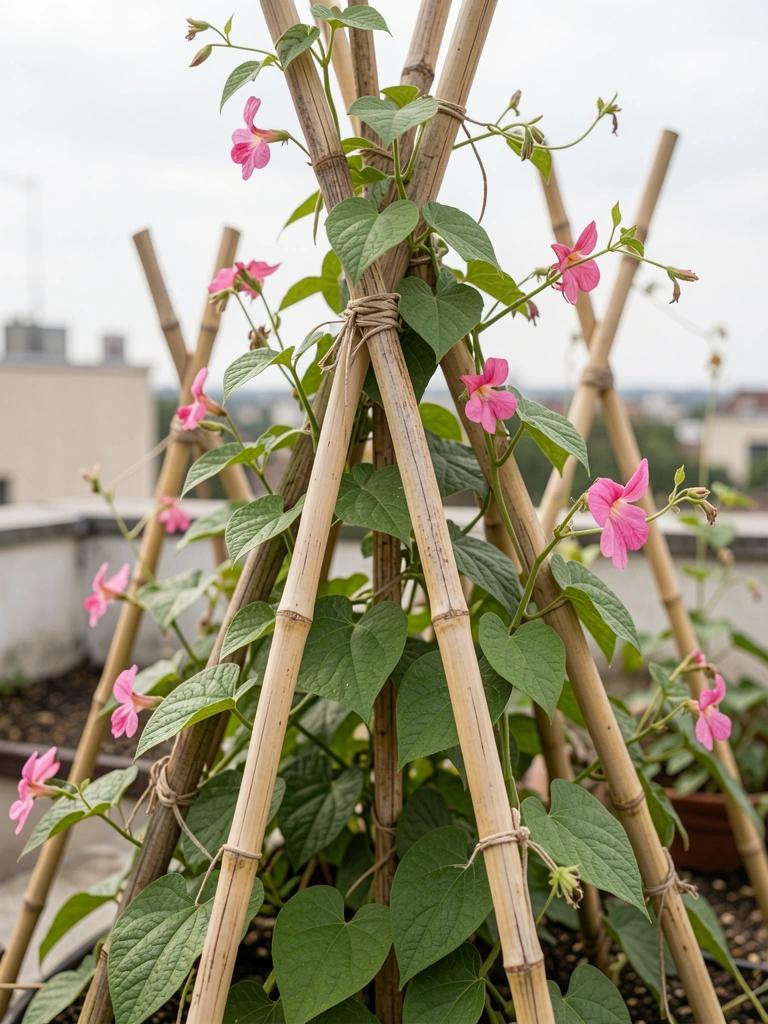
    Three poles lashed made a teepee; bush beans filled it fast. Provider variety snapped crisp. Kids loved the hideout feel.

    Wind-proof with guy lines. Yields piled up.

    What You’ll Need for This Look

    9. Zucchini Tubs Weighted with Rocks

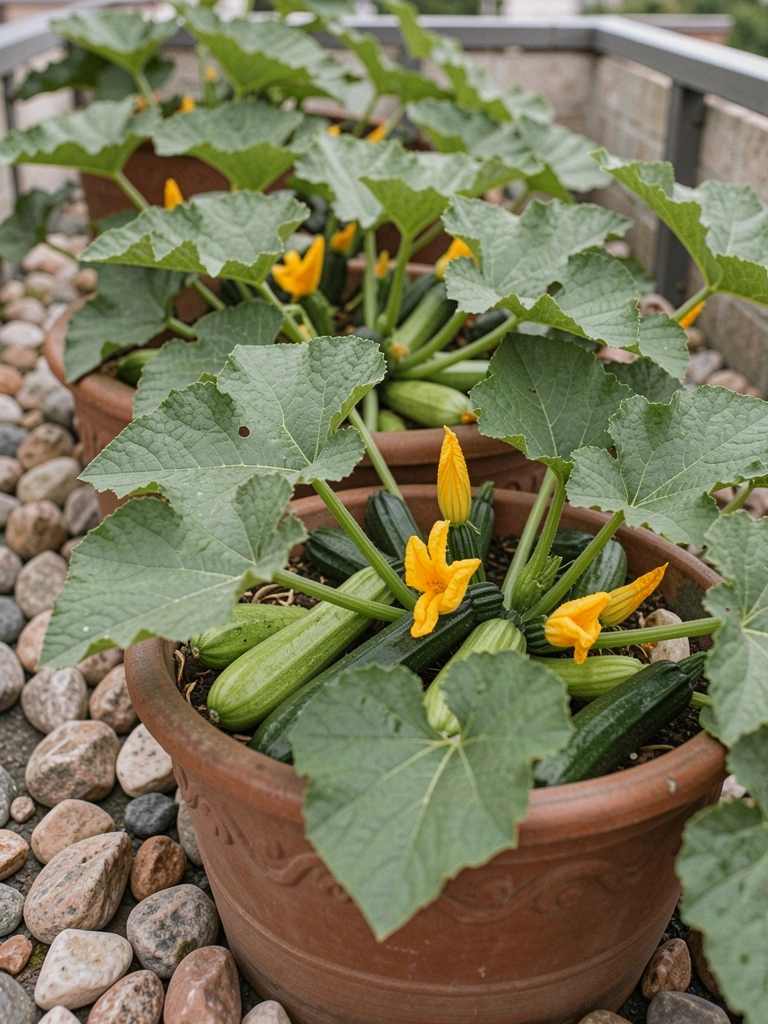
    Big tubs held one zucchini plant each—Black Beauty sprawled contained. Rocks around base stopped rolls. Fruits hid under leaves till huge.

    One vine took over; limit to one per tub now.

    What You’ll Need for This Look

    10. Strawberry Gutters Hung Sideways

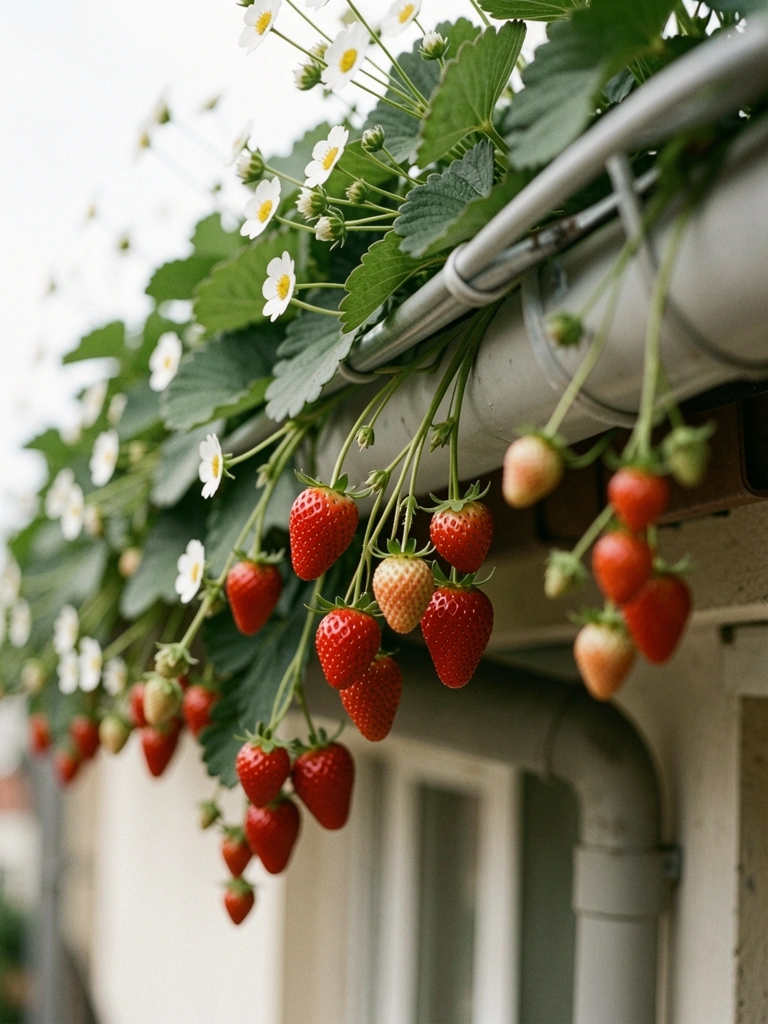
    PVC gutters sideways caught drips, Eversweet berries trailed down. Easy reach, no stoop. Reds glowed against white plastic.

    End caps prevent spills. Trim runners.

    What You’ll Need for This Look

    11. Radish Wedges in Lettuce Crate Gaps

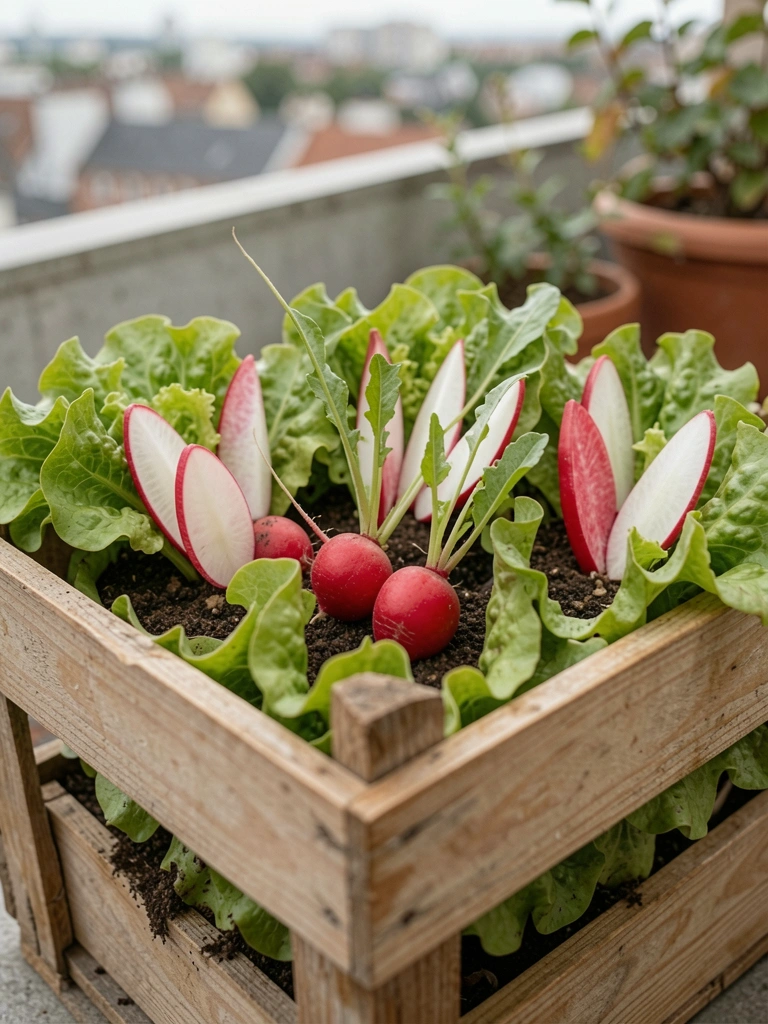
    Sliced radishes fit lettuce gaps—Cherry Belle popped in 20 days. No bare dirt. Quick wins kept momentum.

    They loosened soil for lettuce roots. Thin early.

    What You’ll Need for This Look

    12. Kale Lacinato in Long Window Boxes

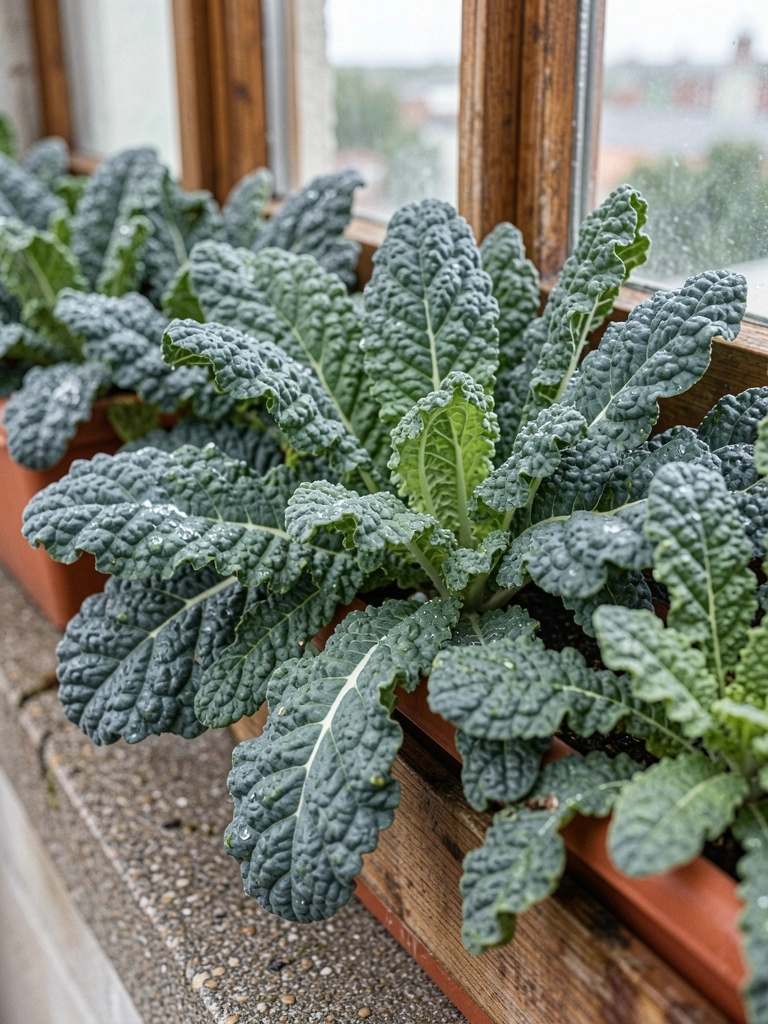
    Long boxes hugged the ledge; Lacinato kale waved tough in gusts. Picked outer leaves forever. Leaves added texture, like fingers reaching.

    Wind toughened them sweeter. Mistake: crowded once, stunted.

    What You’ll Need for This Look

    13. Beet Deep Pots for Dual Harvests

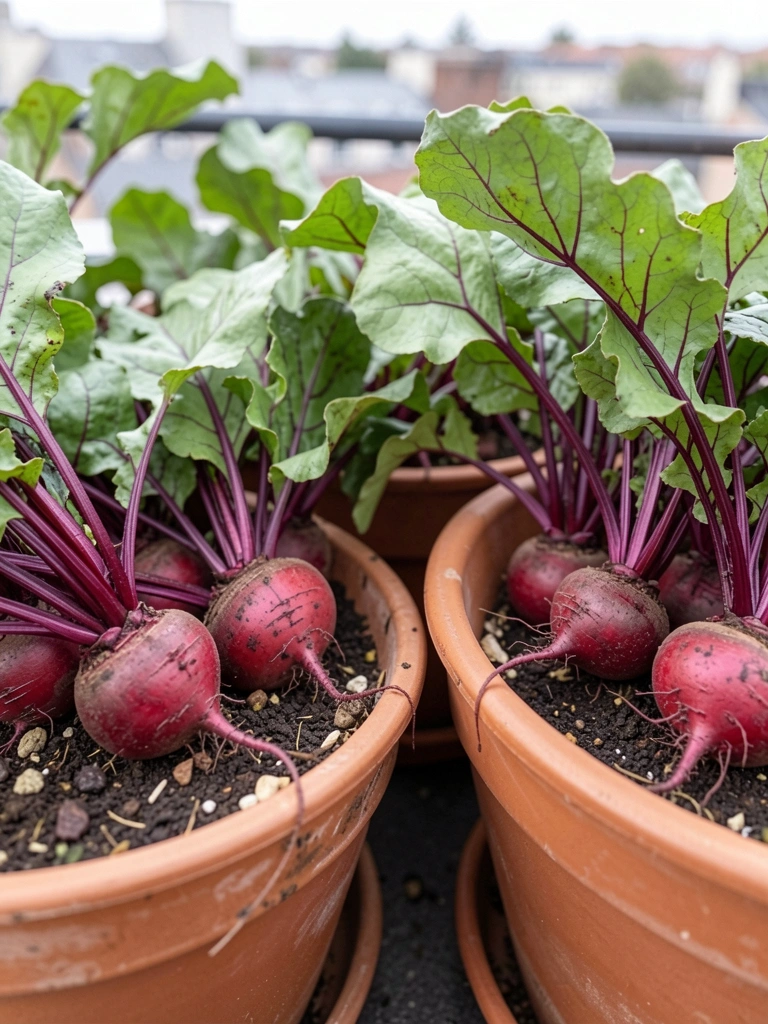
    Deep pots let beets bulb big—greens and roots both. Chioggia striped pretty sliced. Pots stayed put heavy.

    Harvest greens first. Mulch tops.

    What You’ll Need for This Look

    14. Pea Snow Net Towers

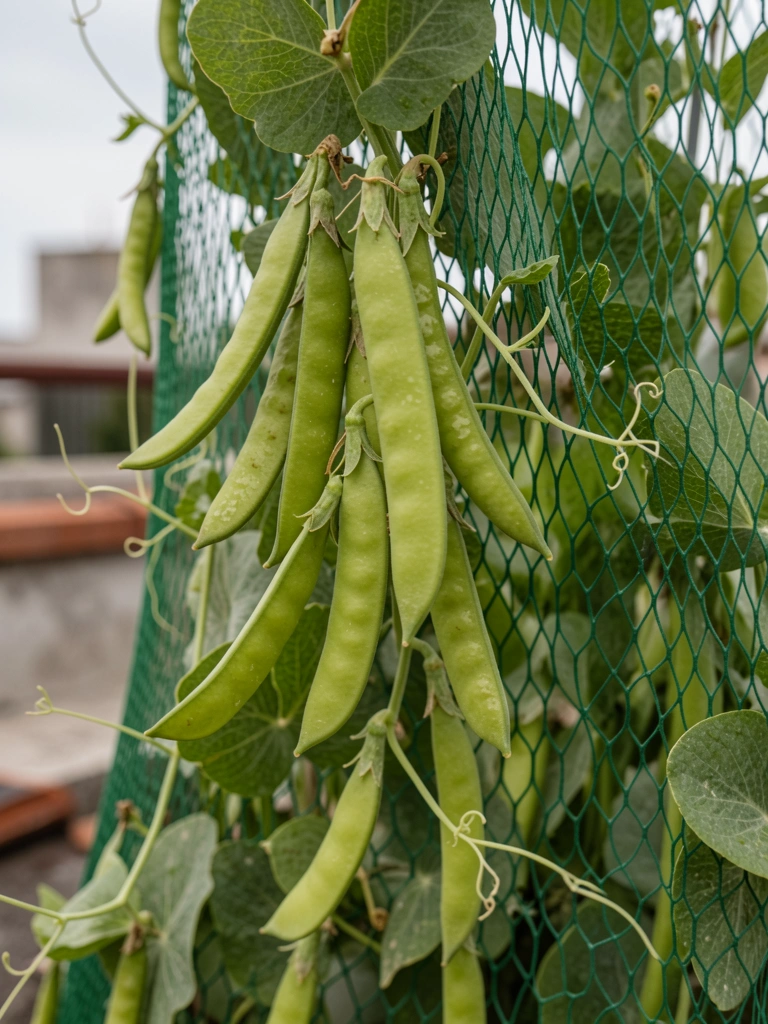
    Net cylinders shot peas up fast—snow peas for stir-fries. Pods dangled pickable. Towers marked sunny zones.

    Sow twice for season long. Pinch tops.

    What You’ll Need for This Look

    15. Onion Sets in Shallow Seed Trays

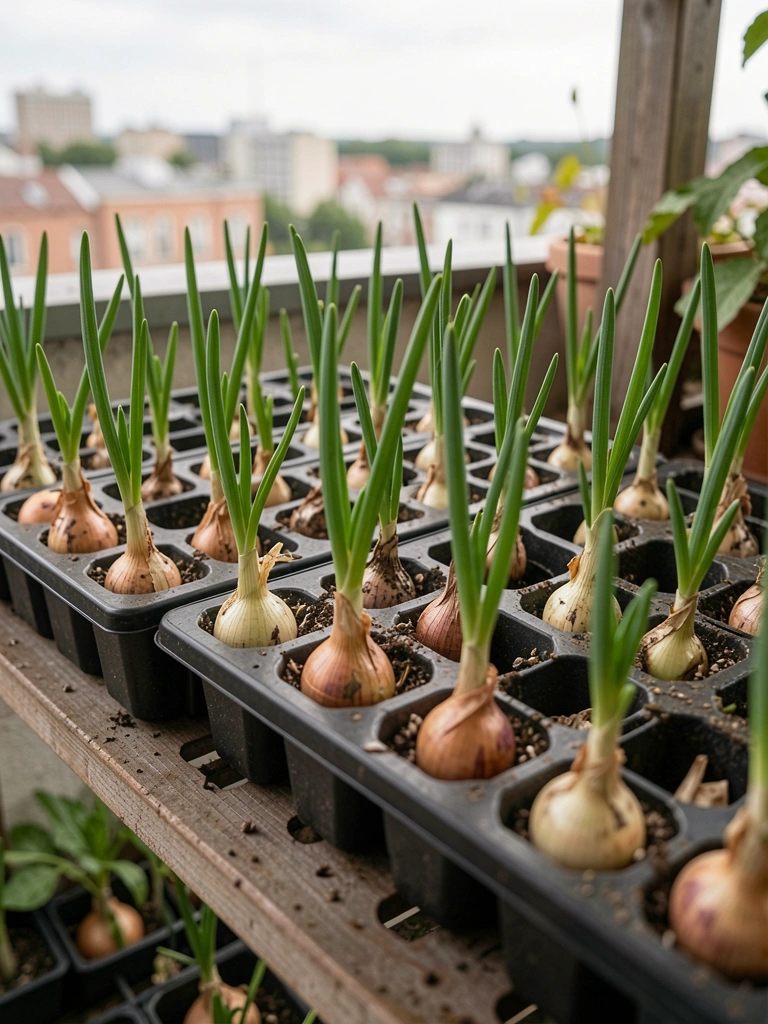
    Trays held onion sets shallow—reds bulbed quick. Lifted whole for storage. Shelves used air space.

    One set rotted wet; drier mix now.

    What You’ll Need for This Look

    16. Spinach Self-Waterers for Dry Spells

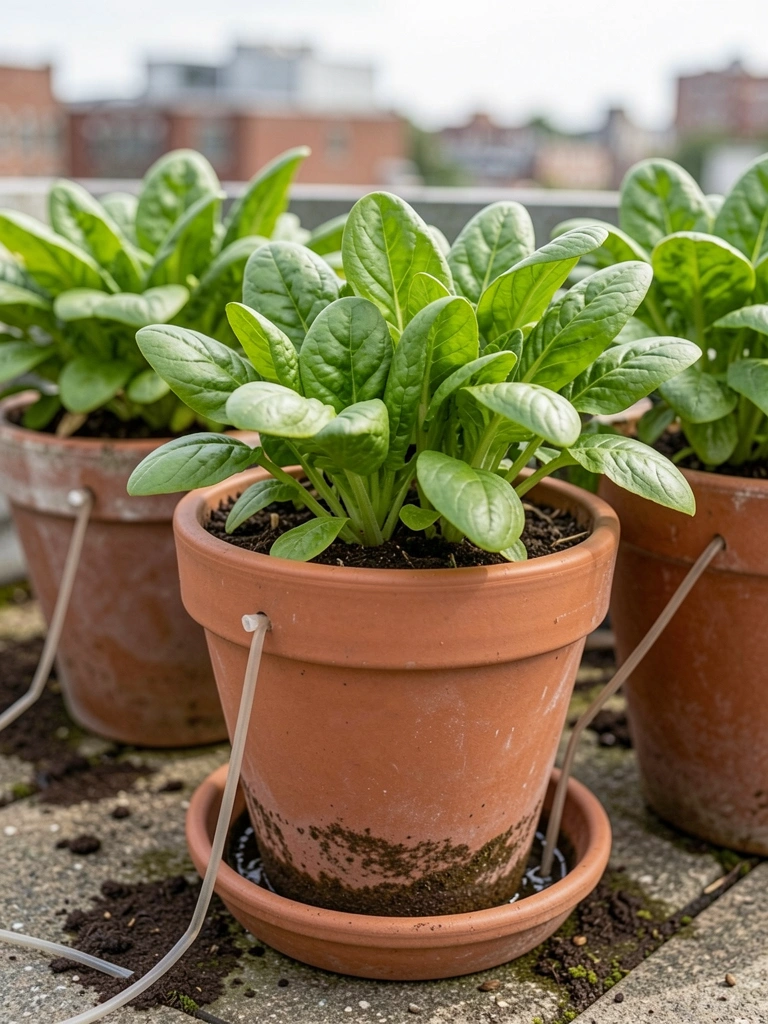
    Self-waterers kept spinach perky through heat—Bloomsdale puckered nice. No daily climbs. Greens filled salads steady.

    Refill reservoirs weekly. Succession sow.

    What You’ll Need for This Look

    17. Eggplant Fabric Pots Breathable

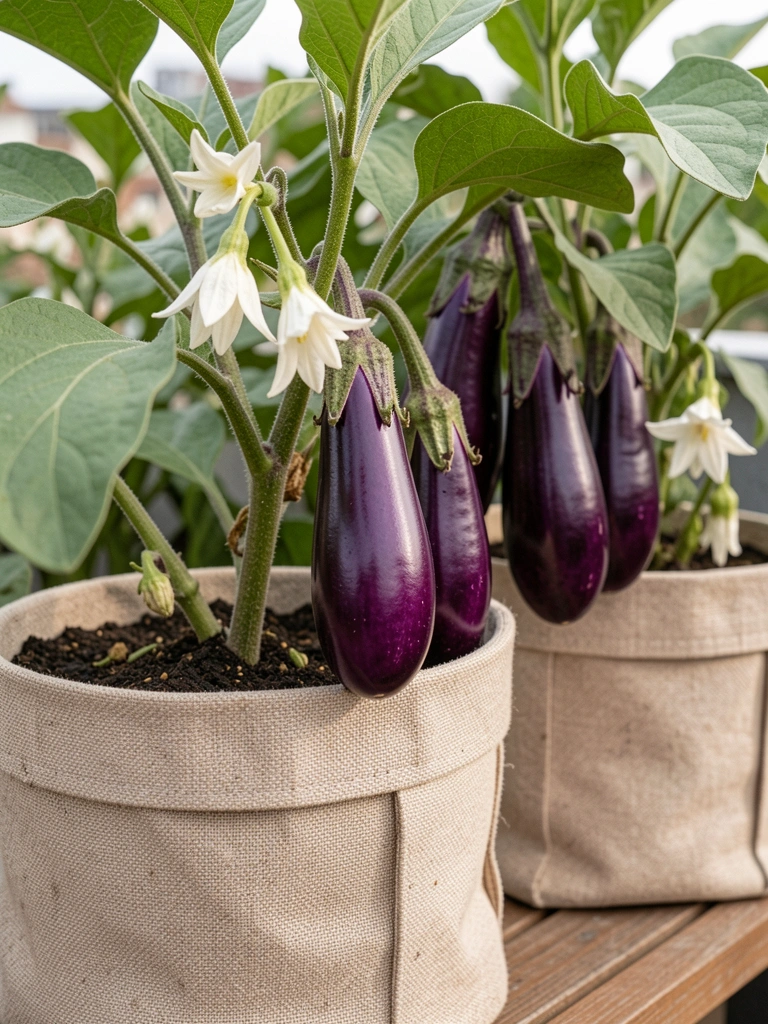
    Fabric pots aired roots; Black Beauties swelled glossy. Stakes held heavy. Pots drained rain fast.

    Support early. Fewer pests.

    What You’ll Need for This Look

    18. Squash Bins with Bottom Drainage

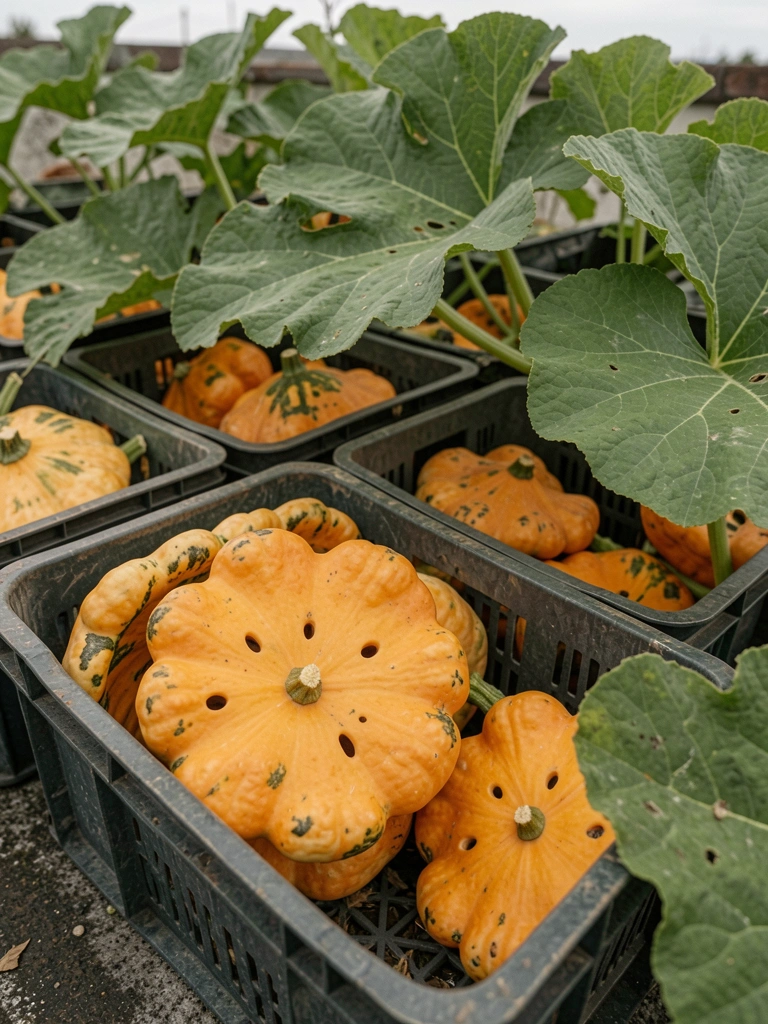
    Bins drilled bottom-up grew pattypans contained. One plant per bin. Harvests stacked.

    Drill plenty. Mistake: undrilled flooded once.

    What You’ll Need for This Look

    19. Mixed Rail Planters for Salad Bar

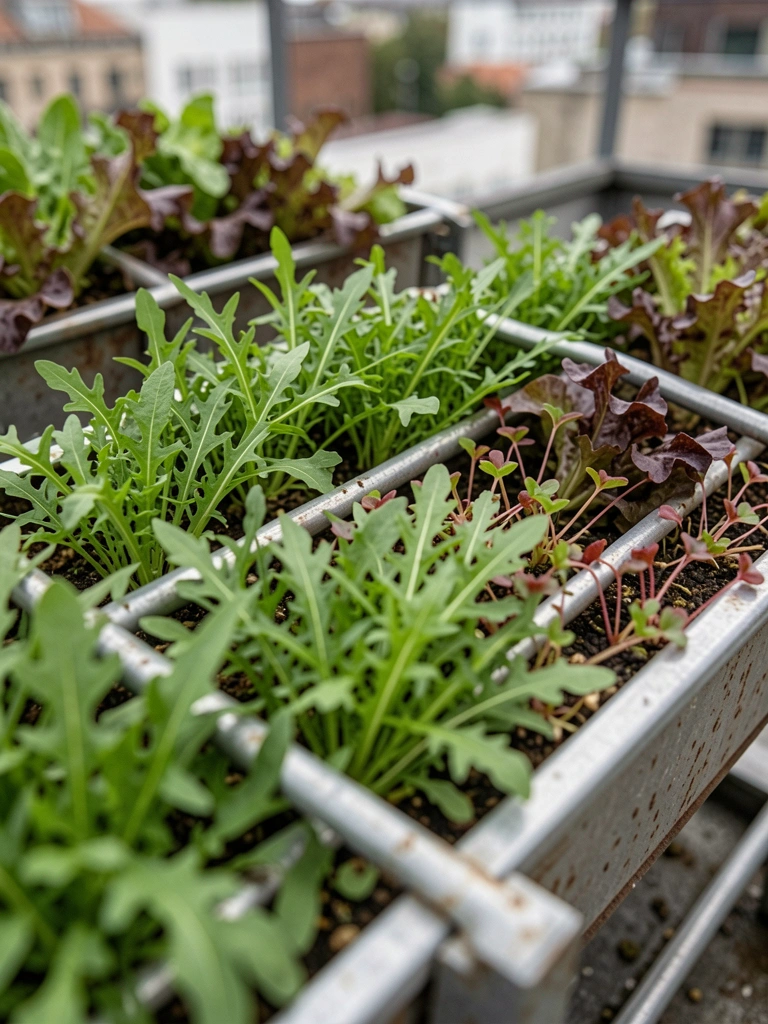
    Rail planters mixed arugula, mizuna—pick-your-own bar. Flavors layered. Rails stayed clear.

    Rotate crops. Water even.

    What You’ll Need for This Look

    20. Leek Long Toms for Steady Cuts

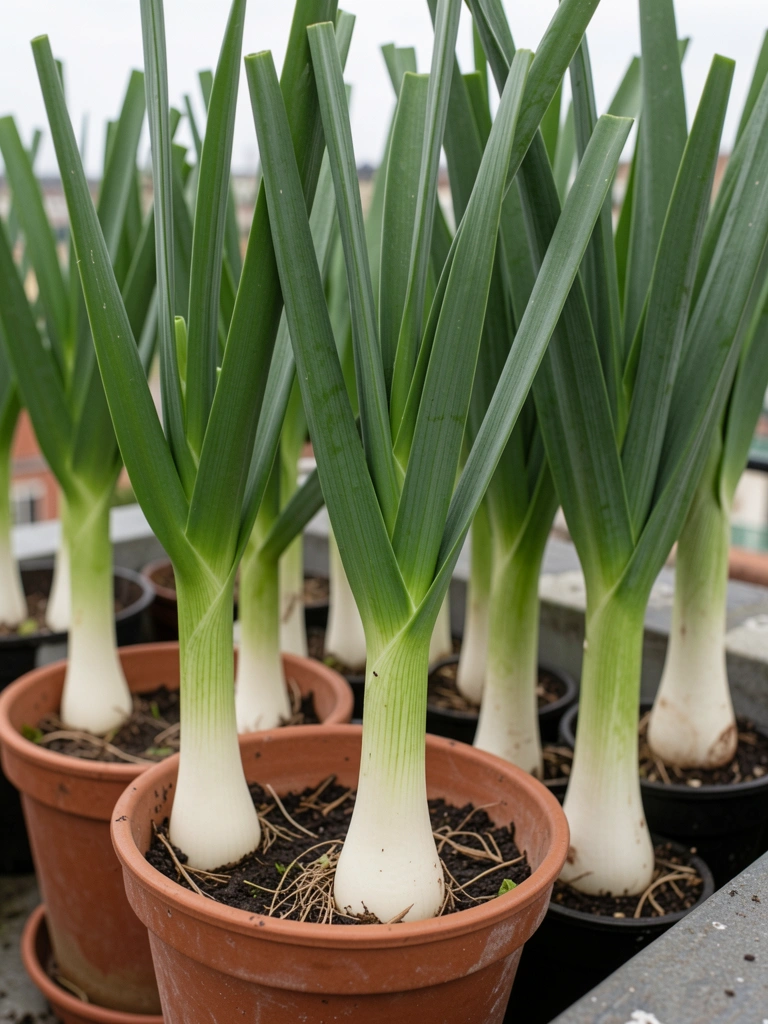
    Long toms suited leeks—King Richard blanched white. Cut greens ongoing. Pots tapered stable.

    Hill soil up. Winter hardy.

    What You’ll Need for This Look

    21. Broccoli Side Shoots in Module Trays

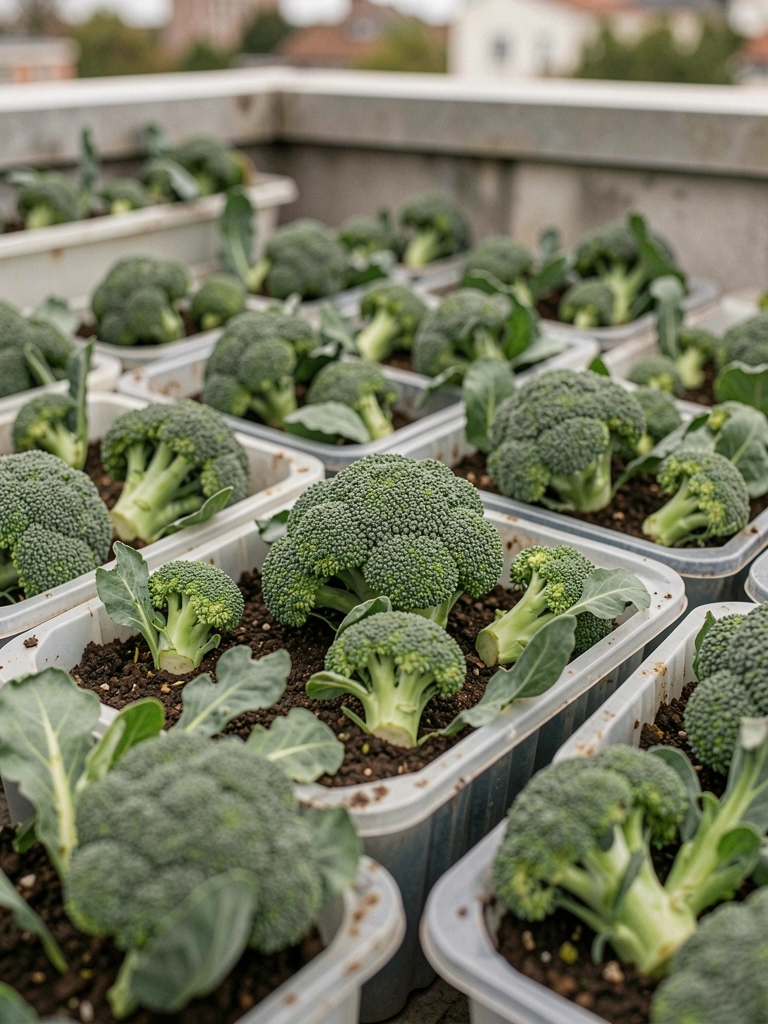
    Modules started broccoli—cut main head, sides kept giving. Waltham 29 reliable. Trays wheeled easy.

    Transplant careful. Net bugs.

    What You’ll Need for This Look

    Final Thoughts

    Start with three ideas that fit your light and space. I've mixed them over years—no rush for all 21.

    Watch your plants daily at first. They'll tell you what works.

    You'll eat fresh rooftop veggies soon. It's simpler than it seems.

  • 11 Stylish Rooftop Garden Ideas for Urban Homes

    11 Stylish Rooftop Garden Ideas for Urban Homes

    I remember staring at my bare rooftop last spring. Concrete everywhere, wind whipping through. Felt like a forgotten parking lot.

    Then I added a few pots. Sat there with coffee, watching birds land. That spot became mine.

    Rooftops like this pull you in once plants take hold. They soften the city noise. Yours can too, without fuss.

    11 Stylish Rooftop Garden Ideas for Urban Homes

    These 11 ideas come straight from my rooftops over the years. Real fixes for wind, weight limits, and small spaces. Each one easy to start small. You'll know exactly what fits your setup.

    1. Layered Container Planting That Fills Empty Corners

    I started layering pots on my first rooftop to hide ugly vents. Low ones for stability, taller behind. Filled with spillers like petunias up front, upright grasses behind. It made that corner feel full, not flat.

    Wind tugs less when bases are wide. Visually, it draws your eye up, softens hard lines. Sit nearby, and it feels enclosed.

    Watch pot weight—fill bottoms with gravel first. I skipped that once; a gust tipped one over.

    What You’ll Need for This Look

    2. Vertical Herb Wall for Everyday Fresh Picks

    My herbs kept getting trampled on the floor, so I bolted pockets to the railing. Basil top, mint middle—easy reach. Now I snip for dinner without bending.

    It greens up blank walls fast. Smells hit you walking out. Cozy like a kitchen garden, up high.

    Bought too much parsley once; it bolted in the heat. Stick to compact varieties.

    What You’ll Need for This Look

    3. Wind-Resistant Succulent Clusters on Low Tables

    Succulents hold up to gusts better than anything leafy. I clustered mine on a low table—shallow pots, heavy stones inside. They catch sun all day.

    The look is clean, modern. Textures mix soft rosettes with spiky ones. Feels calm amid city buzz.

    Group odd numbers for natural flow. Water rarely; they store it.

    What You’ll Need for This Look

    4. Cozy Lounge Nook with Trailing Vine Screens

    I framed my bench with wire for pothos to trail over. Blocks views without blocking light. Added cushions—now it's my reading spot.

    Vines sway gentle, make it feel private. Warmer evenings there.

    Train stems loosely; they fill in.

    What You’ll Need for This Look

    5. Modular Veggie Beds for Homegrown Salads

    Stackable beds let me grow lettuce without permanent weight. Started small; added as roots settled. Harvest feels good up here.

    Colors pop—greens, reds. Fills space smart.

    Overplanted tomatoes first year; crowded them out. Space plants loose.

    What You’ll Need for This Look

    6. Hanging Basket Canopy Over Seating

    Hooks from beams hold baskets above my chairs. Fuchsia and ferns filter sun, cool the air.

    Creates dappled light, intimate feel. Flowers nod in breeze.

    Secure chains tight; wind swings them.

    What You’ll Need for This Look

    7. Privacy Lattice with Native Climbers

    Lattice panels lean against railings; natives like clematis grip fast. Shields neighbors' eyes.

    Blooms scent the air. Green backdrop quiets street sounds.

    Choose lightweight wood; lasts seasons.

    What You’ll Need for This Look

    8. Solar Grasses and Path Lights for Evenings

    Grasses sway by solar stakes. Lights kick on soft, guide steps.

    Evenings feel longer, safer. Glow on blades is simple magic—no, just right.

    Wrong bulbs first; too bright. Go warm white.

    What You’ll Need for This Look

    9. Low-Maintenance Gravel Zen with Boulders

    Gravel bed with boulders—minimal plants. Rake lines for calm.

    Clears mind after work. Clean lines suit modern edges.

    Drainage built-in; no mud.

    What You’ll Need for This Look

    10. Pollinator Pots with Native Wildflowers

    Native wildflowers draw bees, butterflies. Pots clustered low.

    Life buzzes now. Colors shift weekly.

    Too many seeds at first; thinned later.

    What You’ll Need for This Look

    11. Minimalist Agave Focal Point with Pavers

    One big agave centered in pavers. Spikes anchor the space.

    Bold, low-care. Grows sculptural over time.

    Sharp edges—gloves help.

    What You’ll Need for This Look

    Final Thoughts

    Pick one or two ideas that match your light and wind. Start there—no need for the whole list.

    My rooftops grew bit by bit. Yours will settle in too. Enjoy the quiet up there. You've got this.

  • How to Make Fairy Garden on a Stump

    How to Make Fairy Garden on a Stump

    I stared at that old stump in the corner. It was just sitting there, weathered and empty. The yard felt off around it, like a missing piece. One afternoon, I decided to try a fairy garden. It changed the whole spot without much fuss.

    No big plans. Just layers that settled in naturally.

    Now it draws the eye. Feels right.

    How to Make Fairy Garden on a Stump

    This shows you how I fill a stump to make a fairy garden that blends into the yard. It ends up balanced and comfortable. You can do it in an afternoon.

    What You’ll Need

    Step 1: Clean and Map the Stump

    I start by brushing off dirt and loose bark. This reveals the stump's shape—flats, dips, curves. Why? It sets the base for everything to sit steady.

    Visually, the stump wakes up. Gray wood turns warm brown. People miss how dips hold soil best. Don't scrub too hard; keep some texture for grip.

    I step back. See where the main flat is. That’s your anchor spot.

    Step 2: Layer in the Moss Base

    Next, I tuck moss into dips and flats. It softens the wood and holds moisture. This makes the top feel alive right away.

    The change? Stump goes from bare to cushioned green. Insight: Moss bridges gaps between levels. Avoid piling it thick; let it breathe or it molds.

    I press gently. Pat down. Now it invites the next pieces.

    Step 3: Place the Main Structures

    I set the fairy house on the main flat first. Then bench nearby, ladder leaning close. Why? They create a lived-in path feel.

    Now it has focal points. Wood pops against green. Most miss angling pieces for flow. Don't center everything; offset for balance.

    I nudge until it settles. Feels cozy already.

    Step 4: Add Plants and Pebbles

    Succulents go in tiny pots around edges. Pebbles line paths between structures. This grounds it all.

    Visual shift: Layers build depth. Stump feels full but not crowded. Key insight: Plants add height variation. Skip pebbles if wet area; they shift.

    I cluster loosely. Step back. Balance checks out.

    Step 5: Finish with Lights and Details

    Last, I weave lights through moss and around pieces. Solar ones tuck easy. Why? Evening glow makes it warm.

    It ties everything. Soft light on textures. People overlook hiding wires in moss. Don't overload; a few strands enough.

    Now it's done. Sits quiet in the yard.

    Choosing Plants That Last on a Stump

    Stumps dry out fast. I pick what thrives there.

    Moss and sedums hold up. They creep without overwhelming.

    • Sheet moss for base: Stays green, no water fuss.
    • Mini hens-and-chicks: Tough, spread slow.
    • Baby tears if shaded: Fills cracks soft.

    Test one plant first. See how it settles.

    Handling Weather and Wear

    Rain hits stumps hard. I check after storms.

    Moss might shift. Press back in.

    • Clear dead bits weekly.
    • Top with fresh moss yearly.
    • Lights stay put in dry spots.

    It weathers to look more real over time.

    Blending with Your Yard

    Fairy gardens stand alone or link to beds.

    I edge with hostas nearby. Keeps flow.

    Paths of pebbles lead out. Draws the eye natural.

    Start small. Let it grow into place.

    Final Thoughts

    That stump corner feels settled now. I started with just moss one day.

    Yours can too. No rush.

    It pulls the yard together. Quiet spot worth the nudge.

  • How to Make a Fairy Garden

    How to Make a Fairy Garden

    I had this shady corner by the patio steps. Bare dirt, nothing grew right. I wanted something small, inviting, but not fussy. Tried flowers once—they flopped.

    Then I thought of a fairy garden. Not toys, but a quiet spot that pulls you in. It sat empty too long.

    Now it feels right. Balanced. Like it belongs.

    How to Make a Fairy Garden

    This shows you how I build a fairy garden that settles into its spot. You'll end up with a cozy nook that looks natural, not crowded. It's simple enough for a weekend.

    What You’ll Need

    Step 1: Pick Your Base Spot

    I start by walking the yard, looking for that forgotten corner. Shady under a tree works best—too much sun dries it out. I clear leaves, level the soil a bit. Why? It gives everything a steady floor.

    Visually, the spot changes from empty to ready. Bare dirt turns into a clean slate. People miss how light hits here—test it at different times.

    Don't cram it against a wall. Pull it forward a touch for air. That keeps it open.

    Step 2: Layer the Ground Cover

    Next, I spread sheet moss thick. It softens the dirt, holds moisture. Pat it down gentle—no rips. Add pebbles around edges for definition.

    Now it looks grounded, not flat. The green pulls your eye in soft. Most forget moss needs misting first; dry stuff crumbles.

    Skip thick mulch. It buries details later. This way, it breathes.

    Step 3: Place the Main Structures

    I set fairy houses first, off-center. Nestle doors at base, half-hidden. They anchor the space. Why? Creates paths your eye follows.

    The area feels lived-in now—cozy pockets form. Insight: group in threes for balance, not rows.

    Don't glue yet. Test views from sitting spots. Fixes wonky angles.

    Step 4: Add Plants and Pathways

    Tuck mini succulents near houses—low growers that won't overrun. Scatter twigs for fences, pebbles for paths. Curves, not straight lines.

    It gains depth, layers pull you closer. People overlook plant scale; big leaves swamp minis.

    Avoid overplanting. Leave bare moss spots. Lets it settle.

    Step 5: Finish with Small Details

    Last, drop in benches by paths, birdbath central-ish. They invite pause. Step back, adjust for flow.

    Everything balances—warm, intentional. Missed tip: details catch dew, shine morning light.

    Don't cluster front. Spread for depth. Feels right.

    Picking Plants That Fit

    I stick to low, slow-growers. They stay tidy without work.

    Succulents handle shade. Ferns add frills if light's decent.

    • Check pot size first—2-inch max.
    • Group by height: tallest back.
    • Trim yellow bits monthly.

    This keeps it clean, not wild.

    Handling Shade and Sun

    My corner's dappled shade. Full sun scorches minis.

    Watch patterns. Morning light? More plants front.

    • North side: moss heavy.
    • Edge sun: pebbles reflect.
    • Water less in shade.

    Adjusts the feel without fuss.

    Keeping It Fresh Year-Round

    Winter hits, I mulch light. Spring, refresh moss.

    Details hold up outdoors.

    • Hose gentle, no pressure.
    • Repot plants yearly.
    • Swap faded houses.

    Stays comfortable, season to season.

    Final Thoughts

    Start with one corner. Yours might surprise you.

    It took me a few tries to balance mine. Now I sit there evenings.

    Yours will feel right too. Just place, step back, tweak. Grows on you.

  • 21 Front Yard Fairy Garden Ideas to Impress

    21 Front Yard Fairy Garden Ideas to Impress

    I tucked my first tiny door into the front mulch bed last spring. Neighbors waved more. Kids stopped on walks. It pulled the yard together without much work.

    I'd tried big flowers before—too much flop. These small setups stay put.

    They make the front feel lived-in, welcoming. Yours can too.

    21 Front Yard Fairy Garden Ideas to Impress

    Here are 21 front yard fairy garden ideas from my own yard fixes. Each one simple to set up, forgiving on mistakes. You'll see exactly what works.

    1. Whiskey Barrel Fairy Village with Succulents

    I cut the top off an old whiskey barrel and packed it with succulents last year. They spilled over the edges, framing three mini houses just right. The front walk felt cozier, like a little neighborhood appeared overnight.

    At first, I crammed too many plants—water pooled. Spaced them out, and it breathed. Now hens-and-chicks hug the paths I laid with river rocks.

    Watch drainage holes. Succulents forgive dry spells, perfect for front yards.

    What You’ll Need for This Look

    2. Tree Stump Mushroom Houses Cluster

    Our front oak dropped a stump. I hollowed it shallow, glued in mushroom houses. Ferns around softened it. The yard curb got this warm nook feel—people smile walking by.

    I skipped sealant first; rain softened the wood. Hit it with outdoor varnish after. Mushrooms pop against the bark.

    Pick a stump near the path. Low ferns shade without overwhelming.

    What You’ll Need for This Look

    3. Pebble Path to Tree Base Door

    Laid pebbles from the sidewalk to a fairy door at my maple's base. It draws eyes right in, makes the tree a focal point. Front feels intentional now.

    Curved the path slight—straights bore. Added hostas either side for frame.

    Rake smooth yearly. Pebbles shift less in shade.

    What You’ll Need for This Look

    4. Vintage Birdbath Fairy Pond

    Repurposed a chipped birdbath into a pond—added a solar fountain. Mini benches line the edge. Sparkle catches light, cools the front entry vibe.

    Water sat still first; pump fixed bubbles. Refill weekly.

    Edge with low sedum. Keeps it tidy.

    What You’ll Need for This Look

    5. Hanging Basket Trailing Village

    Hung a deep basket by the door, trails ivy with houses tucked on the lip. Swings gentle, adds depth without ground space.

    Overwatered once—roots rotted. Now check soil dry.

    Chain strong. Mix in petunias for color.

    What You’ll Need for This Look

    6. Brick Border Mini Hamlet

    Stacked old bricks low around a gravel patch, dotted with hamlet pieces. Ties to house bricks, feels built-in.

    Bricks sank first rain; leveled with sand base.

    Creeping thyme fills gaps—smells great.

    What You’ll Need for This Look

    7. Clay Pot Stack Fairy Towers

    Stacked three pots decreasing size, added ladders and vines. Corner of the bed got height, draws up the eye.

    Toppled once—no glue. Waterproof glue holds.

    Tuck violas at base.

    What You’ll Need for This Look

    8. Mirror Pond in Fern Grotto

    Set a round mirror flat, surrounded ferns and a bridge. Shady front corner got mystery—light bounces soft.

    Mirror fogged; cleaned monthly.

    Ostrich ferns arch over.

    What You’ll Need for This Look

    9. Lavender Edge Fairy Steps

    Planted lavender rows, stepped stones down to a door. Scent hits first, front path feels inviting.

    Planted too close—split them. Now air flows.

    Compact lavender varieties.

    What You’ll Need for This Look

    10. Rustic Bench Fairy Gathering Spot

    Placed a twig bench amid moss, acorn caps nearby. Quiet front bed spot feels like rest area.

    Moss dried; mist regular.

    Near path edge.

    What You’ll Need for This Look

    11. Seashell Path Fairy Cove

    Curved shells into path to lighthouse. Beach feel in suburb front—stands out.

    Shells scattered wind; edged with wood.

    Blue fescue accents.

    What You’ll Need for This Look

    12. Broken Pot Fairy Hideout

    Tipped a broken pot, glued shards like ruins, added windows. Front bed got story—loved it.

    Glue failed outdoors; switched to silicone.

    Ivy softens edges.

    What You’ll Need for This Look

    13. Solar Lantern Fairy Circle

    Circled toadstools with solar stakes. Nights glow soft, front safe and cozy.

    Batteries dimmed cheap ones; upgraded.

    Mow around.

    What You’ll Need for This Look

    14. Herb Patch Fairy Kitchen

    Bordered herbs with mini pots and spoons. Smells fresh, front feels useful.

    Overgrew mint; contained it.

    Chives for height.

    What You’ll Need for This Look

    15. Boulder Crevice Doorway

    Wedged door in boulder crack, moss around. Solid front accent.

    Door loose; pinned with wire.

    Ajuga groundcover.

    What You’ll Need for This Look

    16. Wire Basket Ivy Hamlet

    Lined basket with moss, houses in, ivy trails. Porch edge got layers.

    Rusted fast; galvanized next.

    Petunias fill.

    What You’ll Need for This Look

    17. Stone Cairn Fairy Tower

    Balanced flat stones into cairn, flag atop. Bed corner got height.

    Toppled kids; wider base.

    Sedum clings.

    What You’ll Need for This Look

    18. Acorn Furniture Fairy Nook

    Glued acorn caps as seats around twig table. Shady nook invites looks.

    Wilted leaves; preserved now.

    Heuchera leaves frame.

    What You’ll Need for This Look

    19. Gravel Arch Fairy Passage

    Bent wire into arch over gravel strip, gate at end. Path illusion works.

    Arch bent; thicker wire.

    Alyssum borders.

    What You’ll Need for This Look

    20. Mulch Bed Seashell Village

    Pressed shells into mulch as village. Blends natural, low fuss.

    Shells sank; hotter glue.

    Dwarf boxwood backs.

    What You’ll Need for This Look

    21. Container Cluster Fairy Town

    Grouped five pots tight, dirt paths between, town signs. Entry pops full.

    Crowded first; thinned plants.

    Mix heights.

    What You’ll Need for This Look

    Final Thoughts

    Pick one or two ideas that fit your front yard's light and space. They grow on you slow.

    Mine took years tweaking—yours will too. Start, watch, adjust.

    You'll have that pull-in feel soon. Dirt under nails worth it.

  • 11 Fairy Garden Lantern Ideas That Glow

    11 Fairy Garden Lantern Ideas That Glow

    One evening last summer, I stepped out after dusk and saw fireflies dancing near my side yard bed. But it was the little solar lantern I'd tucked in there, casting a soft glow on the moss—that pulled me in. Made the whole spot feel alive, like a secret world.

    I'd fussed with fairy garden kits before, but they never lasted. Too pristine, too fake. This time, I used what was already growing wild.

    Now, every night it draws me back. You can do this too, even in a messy corner.

    11 Fairy Garden Lantern Ideas That Glow

    These 11 ideas come straight from my yard trials. Each one glows without wiring, fits real gardens, and lasts. You'll see exactly how to set them up.

    1. Moss-Wrapped Solar Lantern Base

    I started with a cheap solar lantern that tipped over in wind, so I wedged it into a thick moss clump from my walkway edges. The moss holds it steady, and at night, the light filters through, turning the green fuzzy like a hidden cottage.

    It softened that bare spot under my deck stairs. No more muddy mess—just a cozy nook that pulls you closer after dark.

    Watch the moss dry out; mist it weekly. I forgot once, and it crisped up fast.

    Pick a lantern under 6 inches so it doesn't overwhelm the scale.

    What You’ll Need for This Look

    [a href="https://www.amazon.com/s?k=solar+lantern+small+4+inch+moss+friendly&tag={{flowpinsystem-20}}">Small solar lantern (4 inch, metal)
    [https://www.amazon.com/s?k=sphagnum+moss+dried+sheet+garden&tag={{flowpinsystem-20}}](Sphagnum moss sheets)
    Bare root ferns

    2. Pebble Path Leading to Lantern Glow

    My gravel path was dull until I lined it with pea gravel and ended it at a low solar lantern. Planted creeping thyme along the edges—it spreads slow but smells great when you brush it.

    Nights now, the lantern pulls your eye down the path, making the bed feel deeper. Changed how I walk out there.

    Don't overpack pebbles; too many choke the plants. I dug mine out twice.

    Thyme takes a season to fill in—be patient.

    What You’ll Need for This Look

    Low solar pathway lantern (4 inch)
    White pea gravel bag
    Creeping thyme plugs

    3. Hanging Lantern from Twisted Branch

    I found a gnarled branch from my oak cleanup and hung a tiny solar lantern from it with wire. Added ivy scraps at the base—they climb slow but grip tight.

    It swings gentle in breeze, lighting the trunk like an old tree spirit spot. Makes evening chores feel slower, better.

    Wire too loose first time; it clanked all night. Twist tight but not crushing.

    Scale down—branch under 2 feet keeps it fairy-sized.

    What You’ll Need for This Look

    Mini solar hanging lantern (3 inch glass)
    Garden wire thin gauge
    English ivy cuttings

    4. Lantern Nestled in Succulent Cluster

    Succulents spread easy in my dry front bed, so I pushed a flat solar lantern right into a cluster of echeveria. Pebbles around the base hide the edges.

    Glow outlines each leaf at dusk—turns a plain dish into something you linger over coffee.

    Overwatered once; rotted two plants. Let soil dry fully between.

    Low dish keeps it grounded, not floating.

    What You’ll Need for This Look

    Flat solar disk lantern (5 inch)
    Echeveria succulent assortment
    Decorative pebbles mixed

    5. Whiskey Barrel Lantern Alcove

    My old whiskey barrel leaked at first, but I sealed it shallow and set a lantern inside with hosta edges. Moss on the rim softens the wood.

    Night light bounces off the curves, warming the patio corner. Feels like a backyard pub hideout.

    Sealant matters—mine warped without it.

    Hostas shade the lantern base, keeps it from overheating.

    What You’ll Need for This Look

    Half whiskey barrel planter
    Solar lantern rustic (6 inch)
    Hostas bare root

    6. Fairy Door Lantern Threshold

    I carved a simple door from scrap wood and lit it with a slim solar lantern above. Toadstool mushrooms from seed popped up beside.

    Glow frames the door like an invite—kids spot it first every time.

    Paint peeled fast; use outdoor varnish.

    Mushrooms need shade; mine fried in full sun once.

    What You’ll Need for This Look

    Wooden fairy garden door (4 inch)
    Slim solar wall lantern
    Toadstool mushroom spores

    7. Orb Lantern in Fern Grotto

    Ferns from my woods edge filled a pot grotto, orb lantern buried halfway in. Bark mulch ties it.

    Light diffuses soft through fronds—quiet spot for reading now.

    Orbs crack if frozen; store winters.

    Ferns yellow without humidity—group them tight.

    What You’ll Need for This Look

    Glass orb solar lantern (5 inch)
    Ferns assorted mini
    Bark mulch fine

    8. String Lanterns Over Mini Pond

    String lights over my birdbath "pond" with lily pads—lantern shapes clip on easy. Water reflects double glow.

    Ripple effect at night calms everything. Frogs love it too.

    Strings tangle; stake ends.

    Lilies rot in still water—add bubbler.

    What You’ll Need for This Look

    Solar string lanterns (10 pack small)
    Mini pond liner kit
    Dwarf water lilies

    9. Rustic Stack Lantern Tower

    Stacked flat rocks around a central lantern, air plants in crevices. No glue—friction holds.

    Tower glows tall but steady, anchors the bed visually.

    Rocks shift in rain; wedge pebbles.

    Air plants need soak weekly—I skipped, they dried.

    What You’ll Need for This Look

    Stackable solar lantern (5 inch)
    Flat river rocks set
    Air plants tillandsia pack

    10. Lavender Border Lantern Line

    Lavender rows from my herb bed, lanterns spaced every foot along. Scent hits with the light.

    Path feels framed, safe to walk. Bees buzz day version.

    Lavender bushes outgrew—trim yearly.

    Lanterns face up for max glow.

    What You’ll Need for This Look

    Low solar stake lanterns (pack of 6)
    English lavender plants
    Fine gravel path mix

    11. Birdhouse Roof Lantern Perch

    Birdhouse on stump, lantern wired to the peak. Vines soften the sides.

    Roof glow welcomes birds at dawn too—full day spot.

    Birds pecked wire; use coated.

    Vines grow fast—prune.

    What You’ll Need for This Look

    Mini wooden birdhouse
    Solar lantern clip-on (3 inch)
    Climbing vine starts

    Final Thoughts

    Pick one idea that fits your yard's light and soil. Mine started small, grew over seasons.

    No need for all 11—just the one that calls to you.

    You'll have that glow soon. It changes evenings quiet-like.

  • 10 Japanese Fairy Garden Ideas with Zen Charm

    10 Japanese Fairy Garden Ideas with Zen Charm

    Last summer, I cleared a forgotten corner of my yard. It was overrun with weeds, nothing special. Then I added a few rocks and moss. Suddenly, it felt peaceful, like a spot to breathe.

    That tiny change pulled me in. I started small Japanese fairy setups. No perfection, just what grows here.

    Now, every patch reminds me: gardens heal when you let them settle.

    10 Japanese Fairy Garden Ideas with Zen Charm

    These 10 ideas come from my own yard trials. They're simple to start, forgiving if plants shift. You'll see exactly what fits your space.

    1. Gravel Zen Corner with Hand-Raked Patterns

    I scooped out a 2-foot square in my side yard. Filled it with fine gravel and river rocks. Every morning, I rake simple waves. It quiets my mind after a long day.

    The patterns hold up through light rain, but I skip days when wind kicks up. Visually, it draws the eye without crowding.

    Pay attention to drainage—add sand underneath or it turns muddy. In my garden, this spot anchors everything else.

    Start with smooth gravel; it rakes easier than rough stuff.

    What You’ll Need for This Look

    2. Mossy Fairy Houses Tucked in Bamboo Shade

    Bamboo clumps in my backyard cast perfect dappled light. I nestled little clay houses there, then packed moss around the bases. It spread fast, softening the edges.

    At first, I overwatered—one house cracked from soggy soil. Lesson learned: mist only. Now it feels cozy, like a hidden village.

    Emotionally, it's a rest spot. Watch for slugs; they love moss too.

    This setup thrives in shade, no fuss.

    What You’ll Need for This Look

    3. Lantern-Lit Pebble Path to a Fairy Nook

    I edged a short path with pebbles from a local creek. Added low stone lanterns along it. At dusk, they light up the way to a small fairy bench.

    It changed how I walk the yard—slower, noticing details. The pebbles shift a bit yearly, but that's fine; rake them back.

    Keep lanterns solar; wiring's a hassle in wet soil.

    This path makes any corner feel intentional.

    What You’ll Need for This Look

    4. Tiny Pagoda Fountain with Trickling Water

    My first fountain attempt leaked everywhere. Switched to a sealed pagoda style, set in a shallow basin. Water trickles softly over rocks—pure calm.

    I added ferns nearby; they love the humidity. Visually, sound draws you close without overwhelming.

    Position away from paths; splash happens. Pump size matters—too strong drowns the zen.

    In my yard, it's the heart of the fairy spot.

    What You’ll Need for This Look

    5. Bonsai Maple Over a Pebble Bed

    I trained a young maple into bonsai shape. Placed it central over a pebble bed. Leaves turn red in fall, warming the whole area.

    Growth surprised me—branches thickened fast. Trim yearly. It feels alive, changing with seasons.

    Protect from full sun; scorch happens quick.

    This anchors a fairy grove nicely.

    What You’ll Need for This Look

    6. Rock Bridge Crossing a Dry Stream

    Dug a shallow dry stream bed with blue pebbles. Arched flat rocks over it as a bridge. Fairies "cross" to a moss island.

    It adds depth without water mess. Pebbles settle in rain, mimicking flow.

    Use wide stones; narrow ones wobble.

    In my garden, it connects two fairy spots seamlessly.

    What You’ll Need for This Look

    7. Azalea Border Framing a Fairy Door

    Planted dwarf azaleas around a tiny door. They bloom pink in spring, framing it perfectly. But I forgot soil acidity—yellowed leaves first year. Amended with pine needles; bounced back.

    Now it's inviting, color pop without chaos.

    Azaleas spread slow; space them 12 inches.

    Feels like entering another world.

    What You’ll Need for This Look

    8. Bamboo Screen Hiding a Fairy Glade

    Rolled out bamboo screening for privacy. Behind it, a glade with moss and a lantern. It shields from street view, creates intimacy.

    Wind rattles it softly—nice touch. Secure tops well.

    Glade stays damp; perfect for moss.

    This makes small yards feel private.

    What You’ll Need for This Look

    9. Stone Lantern Nestled in Fern Grove

    Set a stone lantern in ferns, circled by pebbles. Glows at night. Ferns grew too wild once, smothered it—thinned them out.

    Now balanced, shady retreat. Ferns drop leaves; rake occasionally.

    Humidity keeps it lush.

    Core of my zen fairy area.

    What You’ll Need for This Look

    10. Mini Orchid Archway Over Fairy Steps

    Bent wire into a small arch, trained orchids over it. Leads to mossy steps. Blooms hang delicate, scent in air.

    Orchids need orchid bark; regular soil drowned mine once. Adjusted, now reliable.

    Steps feel secret, purposeful.

    Ends the garden on a high note.

    What You’ll Need for This Look

    Final Thoughts

    Pick one or two ideas that match your yard's light and soil. They'll grow into something yours.

    No need for the whole list. Mine evolved slow, better that way.

    You'll feel that zen pull soon. Just start small.

  • 23 Fairy Garden Ideas in Glass Containers

    23 Fairy Garden Ideas in Glass Containers

    I remember the first time I tucked a tiny fairy garden into an old glass jar on my back step. It was nothing fancy—just some moss from the yard and a few pebbles. But watching bees land on it made the whole patio feel alive.

    Those small scenes pull you in. They fit anywhere, even cramped spots.

    I've messed with dozens over years. Some thrived, others taught me what lasts.

    23 Fairy Garden Ideas in Glass Containers

    Here are 23 fairy garden ideas in glass containers I've built in my real gardens. They're straightforward, use stuff I had or grabbed cheap, and they hold up outdoors. You'll see exactly what to try next.

    1. Mossy Path to a Tiny Fairy Door in a Wide Jar

    I started this one after pulling moss off a shady fence post. Crammed it into a wide-mouth jar with a pebble path snaking to a little wooden door. The moss softened everything, made it look like a hidden entrance.

    Next day, it drew ants exploring—real life kicking in. The jar's rim kept rain from washing it out.

    Pay attention to drainage: poke a few holes in coffee filter at the bottom.

    It sits on my potting bench now, cozy corner.

    What You’ll Need for This Look

    Wide mouth glass jar (quart size)

    Preserved moss sheet green

    Tiny wooden fairy door (2 inch)

    River pebbles small bag

    2. Succulent Steps Climbing to a Fairy Bench in a Glass Bowl

    This bowl setup came from leftover succulents after thinning beds. I layered them like steps up to a twig bench. The glass curves make it pop on a sunny table—clean lines, no fuss.

    Sun hits it right, keeps plants tight and healthy. Feels like a quiet retreat.

    Watch the bowl size; too small crowds roots. Mine's 10 inches across.

    Tucks behind bigger pots, adds height without bulk.

    What You’ll Need for This Look

    Clear glass mixing bowl (10 inch)

    Assorted mini succulents pack

    Tiny twig fairy bench

    Mini stone steps set

    3. Pebble River Winding Past Fairy Houses in a Fishbowl

    I glued tiny houses along a pebble "river" in this old fishbowl. Blue glass pebbles for water, moss on banks. It caught morning light, sparkled like real stream.

    Changed my deck from plain to storybook without much work. Houses stay put in wind.

    Use gravel glue for pebbles; loose ones shift in rain.

    Great for kids to peek into.

    What You’ll Need for This Look

    Round glass fishbowl (8 inch)

    Blue glass pebbles bag

    Mini thatched fairy houses set

    Live moss patches

    4. Trailing Vines Draping a Fairy Swing in a Hanging Orb

    Hung this orb from a shepherd's hook with ivy clippings swinging below a tiny rope seat. Glass catches breeze, vines sway gentle.

    My shady corner got life—feels playful now. Vines root easy in moist pebbles.

    Pick lightweight chain; heavy wire bends branches.

    Swings lightly in wind, draws eyes up.

    What You’ll Need for This Look

    Hanging glass orb terrarium (6 inch)

    Trailing ivy plant small

    Tiny rope fairy swing

    Decorative chain hanger

    5. Book Stack Library for Fairies in a Vintage Bottle

    Tried stacking mini books inside a green bottle, added a ladder. First go, glue melted in sun—lesson learned, use silicone. Now it's solid, cozy reading nook vibe.

    Sits on my herb shelf, pulls you close to spot details. Moss floor stays damp.

    Bottle neck limits size; pick wide ones.

    Feels like fairies study there.

    What You’ll Need for This Look

    Vintage style glass bottle (tall)

    Mini fairy books set

    Tiny wooden ladder (3 inch)

    Silicone craft glue clear

    6. Fern Fronds Framing a Fairy Throne in a Glass Vase

    Planted baby ferns around a bark throne in a clear vase. Fronds arch over, make it regal but simple. Shade keeps them lush.

    Vase on steps now frames the path—welcoming feel. Throne holds steady.

    Trim fronds monthly; they bush fast.

    Quiet spot to sit near.

    What You’ll Need for This Look

    Clear glass vase (12 inch tall)

    Baby fern plants pack

    Twig fairy throne mini

    Pebble gravel mix

    7. Mini Pebble Bridge Over Gravel Stream in Cylinder Glass

    Built a stone bridge spanning gravel "water" in a cylinder. Moss lines edges for green touch. Glass sides show layers clear.

    Deck rail spot makes it eye-level—feels crossed daily. Bridge doesn't tip.

    Layer gravel deep for flow illusion.

    Connects garden paths visually.

    What You’ll Need for This Look

    Tall glass cylinder vase (10 inch)

    Mini pebble bridge kit

    Fine gravel bag gray

    Moss edge pieces

    8. Acorn Cap Mushrooms Around Fairy Hut in Shallow Dish

    Glued acorn caps as mushroom roofs circling a hut in a dish. Natural wood tones blend with yard dirt base.

    Shallow glass lets light through bottom—warm glow. Hut door faces out.

    Acorns dry fast; seal with varnish.

    Earthy spot by veggies.

    What You’ll Need for This Look

    Shallow glass dish (9 inch)

    Acorn caps craft pack

    Mini thatched fairy hut

    Craft varnish spray

    9. Twinkling Pebble Lantern Path in Glass Cloche

    Lined tiny lanterns along pebble path under cloche. LEDs glow soft at dusk. Glass dome traps light cozy.

    Path lights up evenings—path to nowhere special. Moss fills gaps.

    Battery lanterns last weeks; swap easy.

    Tabletop magic without wires.

    What You’ll Need for This Look

    Glass cloche dome (6 inch)

    Mini LED lanterns set

    White pebble path mix

    Sheet moss green

    10. Wildflower Meadow with Fairy Arch in Large Jar

    Pressed wildflowers into meadow base, arched twigs overhead in big jar. Colors fade soft, like real field.

    Fence line spot feels open. Arch holds blooms up.

    Dried flowers last; refresh yearly.

    Breezy, natural look.

    What You’ll Need for This Look

    Large glass jar gallon

    Dried wildflowers mix

    Twig fairy arch mini

    Mini grass tufts pack

    11. Shell Beach Cove for Fairies in Glass Bowl

    Layered sand, shells, driftwood in bowl for beach scene. Sea glass sparkles.

    Patio gets coastal calm. Shells stay colorful.

    Coarse sand drains best.

    Summer table star.

    What You’ll Need for This Look

    Glass serving bowl (12 inch)

    Tiny seashells assortment

    Mini driftwood pieces

    Coarse sand bag white

    12. Autumn Leaf Pile Hideout in Hurricane Base

    Piled fall leaves around hut in hurricane base. Thought real leaves would last—molded quick, switched to faux. Cozy now.

    Porch fall vibe year-round. Leaves crunch look.

    Faux ones don't fade.

    Seasonal without mess.

    What You’ll Need for This Look

    Glass hurricane vase base (10 inch)

    Faux autumn leaves pack

    Twig hideout hut mini

    Bark mulch mini bag

    13. Herb Patch Fairy Kitchen in Apothecary Jar

    Tucked thyme and minis in jar for kitchen scene. Herbs scent the air.

    Windowsill spot smells fresh daily. Pots line up neat.

    Snip herbs for real use.

    Cook's delight.

    What You’ll Need for This Look

    Apothecary jar glass (square)

    Mini thyme plant

    Tiny wooden kitchen table

    Mini clay pots set

    14. Air Plant Pods in Modern Glass Orb

    Suspended air plants in pods inside orb. No soil, clean modern.

    Tree hang sways light. Plants gray-green.

    Soak weekly; dry fast.

    Sleek yard accent.

    What You’ll Need for This Look

    Modern glass orb pendant (5 inch)

    Air plants tillandsia pack

    Wire plant pods set

    15. Cactus Oasis with Fairy Well in Terrarium

    Sand dunes, cacti, central well in terrarium. Dry scene thrives hot.

    Bench spot endures sun. Well draws eye.

    Sparse water only.

    Desert calm.

    What You’ll Need for This Look

    Glass terrarium cube (8×8 inch)

    Mini cactus assortment

    Stone fairy well mini

    Desert sand fine

    16. Fern Grotto with Fairy Stairs in Tall Vase

    Fern walls, stairs up in vase. Mist keeps humid.

    Rock side shady perfect. Stairs climb true.

    High humidity key.

    Hidden cave feel.

    What You’ll Need for This Look

    Tall narrow glass vase (14 inch)

    Lemongrass fern mini

    Mini stone stairs

    Spray bottle fine mist

    17. Twig Treehouse Perch in Glass Tube

    Vertical tube with treehouse midway. Ladder climbs.

    Branch perch tall view. Twigs match trees.

    Secure ladder tight.

    Skyward escape.

    What You’ll Need for This Look

    Narrow glass tube vase (12 inch)

    Twig treehouse mini

    Mini rope ladder

    Preserved leaves mix

    18. Frosty Pine Scene in Dome Jar

    Flocked pines, rocks in dome. Flocking rubbed off first—used spray fix. Winter holds.

    Bench winter watch. Dome seals cold.

    Spray light layers.

    Cozy chill.

    What You’ll Need for This Look

    Glass dome jar (7 inch)

    Mini pine trees flocked

    Frost spray craft white

    White pebble snow base

    19. Mushroom Ring Circle in Glass Globe

    Mushrooms ring moss in globe. Fairy circle lore.

    Grass spot blends. Glows faint night.

    Polymer won't rot.

    Mystic ground.

    What You’ll Need for This Look

    Glass globe terrarium (6 inch)

    Mini mushroom ring set

    Reindeer moss clump

    20. Lavender Field Bench in Shallow Tray

    Lavender stems, bench in tray. Scent lingers.

    Flower bed edge fits. Paths guide.

    Dried holds shape.

    Aromatic rest.

    What You’ll Need for This Look

    Shallow glass tray (11×7 inch)

    Dried lavender bundle mini

    Tiny field bench wood

    Pebble path accents

    21. Bamboo Grove Gate in Cylinder Jar

    Bamboo stalks, gate in cylinder. Tall privacy.

    Path entry frames. Gate swings.

    Trim bamboo tops even.

    Zen passage.

    What You’ll Need for This Look

    Glass cylinder jar (9 inch)

    Mini bamboo stalks pack

    Bamboo fairy gate

    Gravel base fine

    22. Violet Woodland Floor in Fishbowl

    Violets carpet twigs in bowl. Woodland deep.

    Tree base matches. Blooms pop.

    Part shade ideal.

    Purple quiet.

    What You’ll Need for This Look

    Large fishbowl glass (10 inch)

    Mini violet plants

    Natural twig branches

    Fallen leaf mix

    23. Cozy Moss Bed with Fairy Pillow in Small Jar

    Moss bed, pillow in jar. Tried thin moss—too flat, doubled up. Sleepy nook.

    Shelf nightlight spot. Pillow invites.

    Moist moss weekly.

    Restful hide.

    What You’ll Need for This Look

    Small glass jar (pint)

    Thick preserved moss pad

    Tiny fabric fairy pillow

    Mini blanket cloth

    Final Thoughts

    Pick one or two ideas that fit your spot. No need for all 23.

    They grow on you over time, shift with seasons.

    You've got this—start small, watch it settle in. It'll feel right.

  • 17 Fairy Garden Ideas for Kids Party Fun

    17 Fairy Garden Ideas for Kids Party Fun

    Last summer, my niece's birthday party turned chaotic with kids running everywhere. I grabbed some pots and pebbles from the shed, threw together a fairy corner by the patio. They stopped, stared, then knelt down giggling. That quiet magic hit me—simple setups pull them in.

    I've messed up fancier tries before, like glued minis that fell apart in rain. But these real bits from the yard? They lasted through cake crumbs and chasing games.

    Now, parties feel easier. Kids play longer, parents relax. You can do this too, with what’s around.

    17 Fairy Garden Ideas for Kids Party Fun

    Here are 17 fairy garden ideas for kids party fun. I’ve tested them in my yard—quick setups that hold up to little hands. Each one sparks play without fuss.

    1. Broken Pot Mushroom Houses

    I smashed an old terracotta pot last spring—felt bad at first, but stacked the shards into mushroom shapes. Added moss from the fence line. At the party, kids peeked inside for "fairy sleepovers." The uneven edges made it look right, not fake.

    Visually, it grounded the patio edge, drawing eyes down to kid height. Emotionally, they felt like discoverers.

    Watch the glue—waterproof kind only, or rain undoes it overnight. I learned that the hard way.

    Tuck in ferns for green pops; they fill gaps fast.

    What You’ll Need for This Look

    Terracotta pots 6 inch
    Moss sheets for crafts
    Waterproof craft glue
    Pebble bag 5 lb

    2. Pebble Path to Hidden Door

    Kids love paths—they follow without thinking. I lined one with pebbles from the creek, ending at a wood door glued to a stump. Party time, they lined up "visiting fairies," tripping less than on grass.

    It softened the yard's bare spots, making corners cozy. Feet crunched happily.

    Size pebbles small—no choking risk. I skipped big ones once; chaos.

    Press thyme along edges; it spreads, smells good when stepped on.

    What You’ll Need for This Look

    Decorative pebbles 10 lb
    Wooden fairy door 4 inch
    Creeping thyme plants
    Outdoor hot glue gun

    3. Twig Bridge Over Gravel Stream

    Glued twigs into a wobbly bridge over a gravel "river"—kids crossed with toy fairies, yelling "don't fall!" It ate up old yard sticks I'd piled up.

    The blue pebbles caught light, turning dirt playful. Laughter built around it.

    Bend twigs gently; brittle ones snap mid-party. Mine did, fixed with wire.

    Flank with moss for banks—stays damp, looks alive.

    What You’ll Need for This Look

    Natural twigs bundle
    Blue glass pebbles 2 lb
    Craft wire 24 gauge
    Preserved moss 8×10 inch

    4. Acorn Cap Teacup Party

    Collected acorn caps, glued beads inside for "tea." Set on a stump table. Kids hosted fairy tea parties—pure joy watching them pour water.

    It warmed the shady oak spot, felt like a real nook.

    Hunt fresh caps; old ones mold quick. Tossed a batch once.

    Scatter leaves for seating—natural mess hides spills.

    What You’ll Need for This Look

    Acorn cap craft kit
    Tiny glass beads multicolored
    Mini wooden spoons 2 inch

    5. Bottle Cap Throne Circle

    [Image Prompt: Close-up of bottle cap mosaic fairy thrones in dirt circle. Shows colorful caps, twig arms, pebble base, grass edges. Soft daylight. Lived-in feel. Slight depth of field. No text. Focus on warmth and realistic planting.**

    Saved caps from sodas, pressed into dirt thrones with twig backs. Kids sat "ruling fairies," spinning stories. Covered the patchy lawn edge perfectly.

    Colors popped against soil, held attention.

    Sort caps by size first—mix-ups wobble. I rebuilt twice.

    Edge with pebbles for clean lines.

    What You’ll Need for This Look

    Bottle cap assortment pack
    Twig bundle for crafts
    Pebble mix 5 lb

    6. Mossy Hanging Basket Hamlet

    Hung old baskets with moss roofs, twig doors. Kids pointed up, imagining flights. Swung gentle in breeze, party highlight.

    Softened chain-link fence view, added height.

    Water moss daily—dries fast in sun. Forgot once, browned out.

    Use low hooks; kids reach easy.

    What You’ll Need for This Look

    Metal hanging baskets 8 inch
    Sheet moss preserved
    S hook garden clips

    7. Jar Lid Glow Fairy Lights

    Poked lids, strung fairy lights through. Dusk party, they lit paths—kids chased "fireflies." Simple glow changed evening feel.

    Warmed dark corners without glare.

    Battery ones only; cords trip. Swapped after first try.

    Bury bases in soil for steady.

    What You’ll Need for This Look

    Mason jar lids wide mouth
    Solar fairy string lights 10 ft
    Garden stakes plastic

    8. Herb Patch Fairy Market

    Planted herbs, added twig stalls for "market." Kids picked leaves for fairy food—smells drew them close.

    Fresh green filled a sunny strip, useful post-party.

    Thin plants early; overcrowds quick. Mine bolted.

    Snip often for bushy look.

    What You’ll Need for This Look

    Basil starter plants
    Mint herb plants
    Twig market stall kit

    9. Spoon Swing Fairy Park

    Bent old spoons into swings on twine. Kids swung dolls gentle—giggles nonstop.

    Silver caught sun, sparkled play area.

    Drill small holes clean; slips otherwise.

    Pad seats with felt for soft.

    What You’ll Need for This Look

    Metal spoons craft lot
    Natural twine spool
    Mini drill bit set

    10. Pinecone Family Village

    Glued pinecones into huts, families inside. Kids named them, built stories. Used free yard cones.

    Textured browns blended cozy, hid bare soil.

    Dry cones first; damp rot fast.

    Cluster tight for village feel.

    What You’ll Need for This Look

    Pinecone craft bulk
    Stick chimney crafts
    Craft glue sticks

    11. Shell Grotto Hideout

    Piled shells into a bush cave. Kids crawled in for secrets—perfect quiet spot.

    Iridescent shells glowed dim light, inviting.

    Rinse shells good; salt lingers.

    Prop bush branches open.

    What You’ll Need for This Look

    Seashell mix 1 lb
    Pebble floor bag
    Fern starter plants

    12. Ladder to Tree Fairy Loft

    Twine-wrapped sticks made a ladder to low branch. Kids climbed "to fairy loft"—safe fun.

    Added vertical play, broke flat yard.

    Secure top tight; wobbles scare.

    Short for little legs.

    What You’ll Need for This Look

    Natural stick bundle long
    Jute twine thick
    Moss step accents

    13. Petal Bed Fairy Nooks

    Pressed petals into rock beds. Kids tucked dolls in—smells heavenly.

    Soft pinks freshened flowerbed edge.

    Use fresh petals only; dried crumble.

    Refresh daily.

    What You’ll Need for This Look

    Dried flower petals bulk
    River rocks smooth
    Twig frame set

    14. Nut Boat Pond Dock

    Walnut halves as boats on wet pebbles. Kids pushed with sticks—races!

    Mini water play without mess.

    Seal shells light; soak warps.

    Shallow "pond" best.

    What You’ll Need for This Look

    Walnut shell halves craft
    Leaf sail craft paper
    Pebble pond kit

    15. Bark Picnic Fairy Table

    Bark slab table, cone seats. Kids picnicked tiny foods—group play spot.

    Rustic fit woodsy yard.

    Sand edges smooth.

    Moss runner center.

    What You’ll Need for This Look

    Bark slab craft 12 inch
    Pinecone seats small
    Preserved moss runner

    16. Feather Perch Fairy Roost

    Stuck feathers in twig perches. Kids "fed" bird fairies—light touch play.

    Feathers floated breeze, dreamy.

    Pluck clean; dirt shows.

    Low branch mount.

    What You’ll Need for This Look

    Craft feathers assorted
    Twig perch bundle
    Felt nest lining

    17. Cinnamon Fence Fairy Gate

    Wired cinnamon sticks into fence. Kids opened "gate" to enter—smells drew them.

    Spice scent lingered party long.

    Weatherproof wire; slips rainy.

    Short posts steady.

    What You’ll Need for This Look

    Cinnamon sticks 4 inch bundle
    Floral wire green
    Twine gate ties

    Final Thoughts

    Pick two or three ideas that fit your yard—don't overdo. Kids love the hunt more than perfection.

    I've seen these hold up through spills and sun. Yours will too.

    Grab bits, set up morning of. They'll play happy.

  • 13 Fairy Garden Ideas for Toddlers to Explore

    13 Fairy Garden Ideas for Toddlers to Explore

    Last summer, my two-year-old started collecting sticks by the patio. I saw her squatting low, making up stories about tiny friends. So I added a few pots and stones to her pile. Now she spends hours there, safe and happy. No perfection needed – just spots that pull her in.

    Those little gardens changed our mornings. Dirt under nails, but her grin made it simple.

    13 Fairy Garden Ideas for Toddlers to Explore

    These 13 fairy garden ideas come straight from my yard trials with my toddler. They're safe, low-mess, and easy to tweak. You'll get exactly 13 ideas to try, each with what worked for us.

    1. Pebble Path Leading to Clay Pot Doors

    I laid a winding pebble path last spring because straight lines bored her. She followed it like a map, giggling at the end where I half-buried pots as doors. The stones stayed put, no tripping. Visually, it drew her eye through the grass, making the yard feel bigger.

    One mistake: too many big rocks at first – she tripped. Switched to smooth river pebbles, perfect.

    Now it pulls her back daily. Pay attention to drainage; pebbles shift in rain but settle cozy.

    Keep paths 6 inches wide for little feet.

    What You’ll Need for This Look

    2. Upside-Down Pot Mushroom Cluster

    Flipped old pots for mushrooms after she knocked one over – genius fix. Painted caps red with white spots, stems green. They cluster under a tree, soft and huggable. The yard felt storybook without trying.

    She pokes the dirt inside, safe from edges. Changed how we play; now it's her "fairy home base."

    Use non-toxic paint; I learned that quick.

    Cluster three or four, not too tight.

    What You’ll Need for This Look

    3. Twig Bridge Over Gravel Stream

    Glued twigs into a bridge over gravel in a shallow tray. She crosses it with toys, pretending rushing water. The gravel crunches soft underfoot, no mess scatter.

    It frames a quiet corner visually, pulling her focus. Started as sticks; added bridge for crossing thrill.

    Watch glue dry fully – mine slipped once.

    Keeps her hands busy, off screens.

    What You’ll Need for This Look

    4. Tree Stump Fairy Door Entry

    Cut a stump flat, glued a door low. She peeks in, adds leaves as rugs. Stump's texture feels real, not plastic. Yard corner warmed up instantly.

    Emotionally, it's her secret spot. Grew clover around for green frame.

    Don't carve deep; stumps rot uneven.

    Ladders from popsicle sticks climb easy.

    What You’ll Need for This Look

    5. Bottle Cap Flower Meadow

    Collected caps, painted petals, wired stems into soil. Meadow blooms bright against dirt. She picks "flowers" gently, no real damage.

    Visual pop changed bare patch to play zone. Recycled feel cozy.

    One issue: caps faded in sun. Added sealant.

    Scatter loosely, mimic wild growth.

    What You’ll Need for This Look

    6. Succulent Village in a Broken Tray

    Used a cracked tray for succulent houses. Low plants, safe to touch. She names each "home," rearranges pots.

    Tray edges contain mess perfectly. Yard felt fuller, softer.

    Succulents thrived in partial shade – surprise win.

    Space pots for tiny walks between.

    What You’ll Need for This Look

    7. Acorn Cap Teacup Party Spot

    Hollowed acorn caps for cups on a stump table. She hosts "tea" with dirt. Caps hold shape, no spills.

    Cozy nook formed naturally. Added chamomile for scent.

    Foraged too green once – dry them first.

    Beads as sugar, safe fun.

    What You’ll Need for This Look

    8. Seashell Cove with Sand Base

    Sand in a dish, shells as huts. She digs beaches, calm focus. Textures mix soft and gritty right.

    Patio corner beachified. Sea glass sparkles safe.

    Sand dried clumpy – sift often.

    Shells glue lightly, easy move.

    What You’ll Need for This Look

    9. Mossy Rock Throne Circle

    Stacked flat rocks, patted moss on top. Throne circle for her "queen" play. Rocks stable, toddler height.

    Shady bed feels inviting now. Violets spread slow, pretty.

    Moss needs mist; forgot once, browned.

    Circle 3 feet wide max.

    What You’ll Need for This Look

    10. Solar Lantern Fairy Path

    Staked solar lanterns along mulch. Lights up at dusk, her evening draw. Path glows cozy, safe glow.

    Extended playtime visually. Lamb's ear soft borders.

    Batteries dimmed fast – quality ones now.

    Curve gently for wander feel.

    What You’ll Need for This Look

    11. Herb Patch Market Stalls

    Crates of herbs as stalls. She "sells" leaves, smells strong. Scents fill air, engaging senses.

    Patch smells alive now. Basil grew tall – trim regular.

    Overwatered mint once, drowned.

    Stalls knee-high for her.

    What You’ll Need for This Look

    12. Pinecone Roof Cottages

    Twig bases, pinecone roofs glued. Cottages weather real. She adds needle beds.

    Forest edge feels homey. Needles mulch natural.

    Pinecones moldy wet – dry storage.

    Group in pairs, village vibe.

    What You’ll Need for This Look

    13. Leaf Boat Fleet on Puddle Pond

    Shallow dish puddle, leaf boats sail. She pushes with sticks, splash control.

    Pond corner alive with motion. Water forget-me-nots edge soft.

    Leaves wilt fast – refresh daily.

    Pebble rim contains water.

    What You’ll Need for This Look

    Final Thoughts

    Pick one or two ideas that fit your space. My garden's a mix, grown over time. Your toddler will guide the rest.

    No rush for all 13. They'll love the simple spots most. You've got this – dirt and all.